
This easy strawberry galette recipe is made with fresh strawberries and a simple pie crust. The jammy, gooey filling has a hint of lemon, and the tender crust is flaky and delicious. So much easier than making pie, bakes in about 30 minutes!

Aside from being gorgeous and delicious, a fresh strawberry galette is an easy way to get summer berries into a dessert without any stress or exertion. It is rustic and made to be imperfect and impromptu.
We'll use a sour cream pie dough, which is flexible and un-finicky. It will hold its own as it gets crispy on the baking sheet, doesn't get soggy, and keeps all those bubbling strawberry juices contained.
Speaking of those juices! They form a jammy, gooey filling that is exactly what you want when baking with strawberries. My taste-testers at work absolutely raved about how good it is!
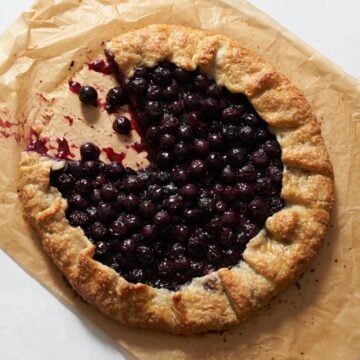
Galettes can be made with almost any kind of fruit, try my Apple Galette recipe or this Blueberry Galette!
Jump to:
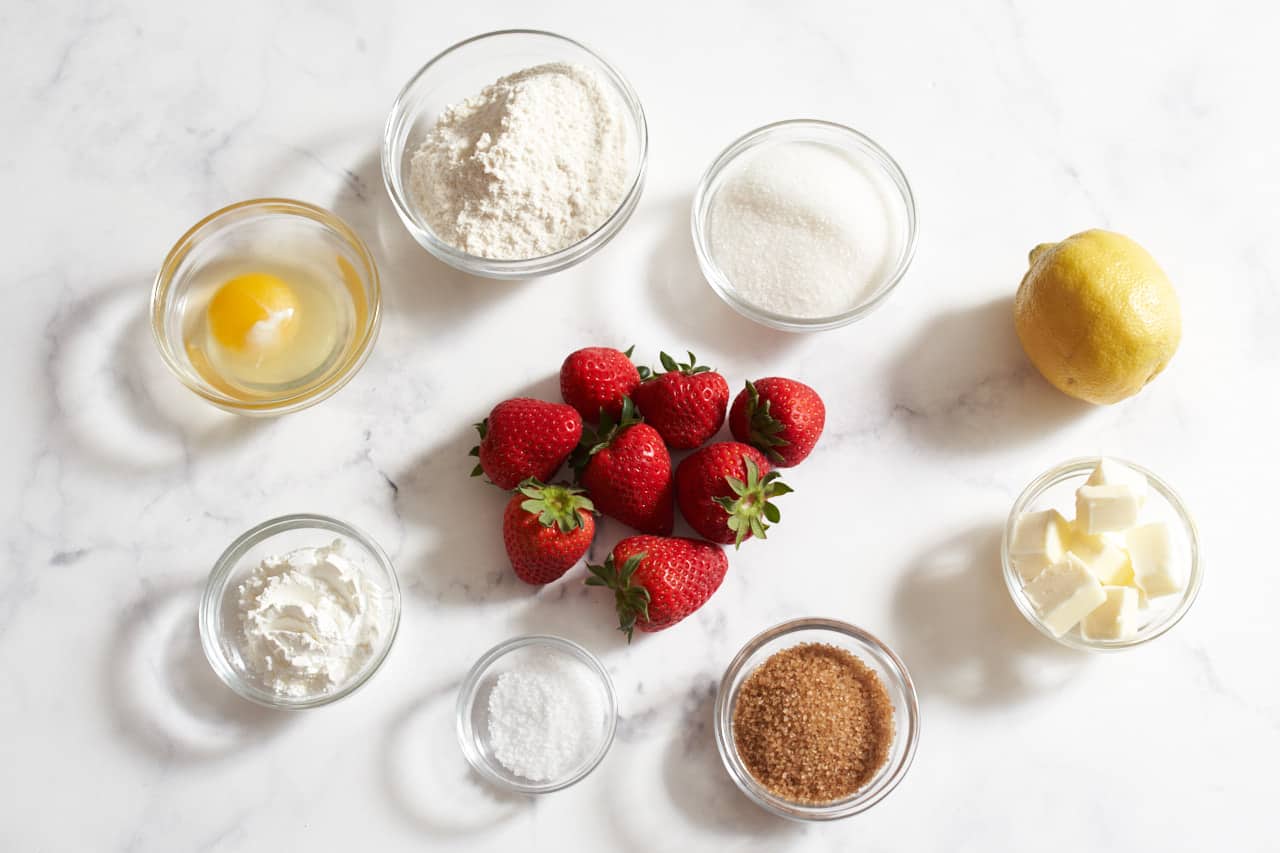
Strawberry galette ingredients
For the strawberry filling
- Fresh strawberries: This galette recipe is just made for spring and summer when strawberries are at their peak of perfection. But honestly, you can make it year round.
- Granulated sugar: Even if the strawberries are quite sweet, we need the sugar to help the juices set up.
- Corn starch: I prefer corn starch over flour to thicken the galette filling, because it gives the strawberry juices a glossy texture.
- Lemon zest and lemon juice: Lemon juice gives us a hit of acid to balance the sweetness of the strawberries, and adds pectin which—again—helps the mixture thicken so you get that signature jammy strawberry pie filling texture when it comes out of the oven. The lemon zest adds great aroma.
For the galette dough and finishing the crust
There are many different recipes for galette crust, some incorporate cornmeal or almond flour, some use buttermilk. This galette dough is made with a sour cream pie crust, which is a bit more forgiving than all-butter pie dough. It's tender and easy to roll out.
- All-purpose flour: Standard AP flour works perfectly.
- Cold unsalted butter: We'll use a whole stick of butter, and keep it as cold as we can throughout the process to ensure flaky layers in our finished crust.
- Kosher salt: We need a little salt to balance all the sweet flavors.
- Sour cream: Sour cream adds more fat and a bit of moisture, and gives the dough a bit of flexibility so it's easy to handle and shape.
- Ice water: We may use a bit of it, we may use all of it. The important thing is to add it a little at a time so the crust doesn't get too wet.
- Egg and 1 teaspoon of water: This will make our egg wash to brush the crust before baking.
- Turbinado sugar (raw sugar): A sprinkle of turbinado sugar on the egg wash around the crust will add sweetness and crunch. You can also substitute granulated sugar.
How to make a strawberry galette
Recipe adapted from multiple sources including Smitten Kitchen and New York Times Cooking.
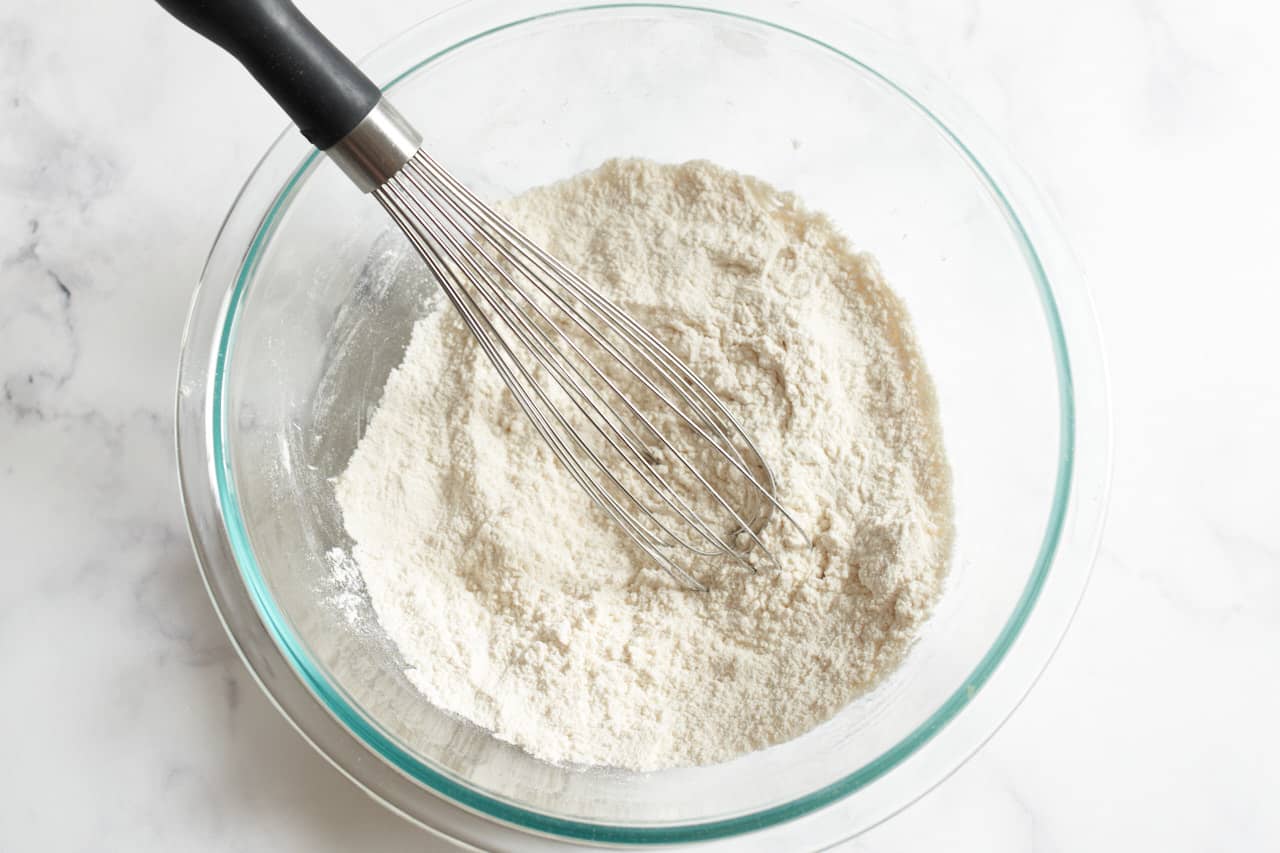
Step 1: Make the galette dough
Cut the butter into cubes and pop it into the freezer for 5 - 10 minutes. Meanwhile, whisk the flour, salt, and sugar together.
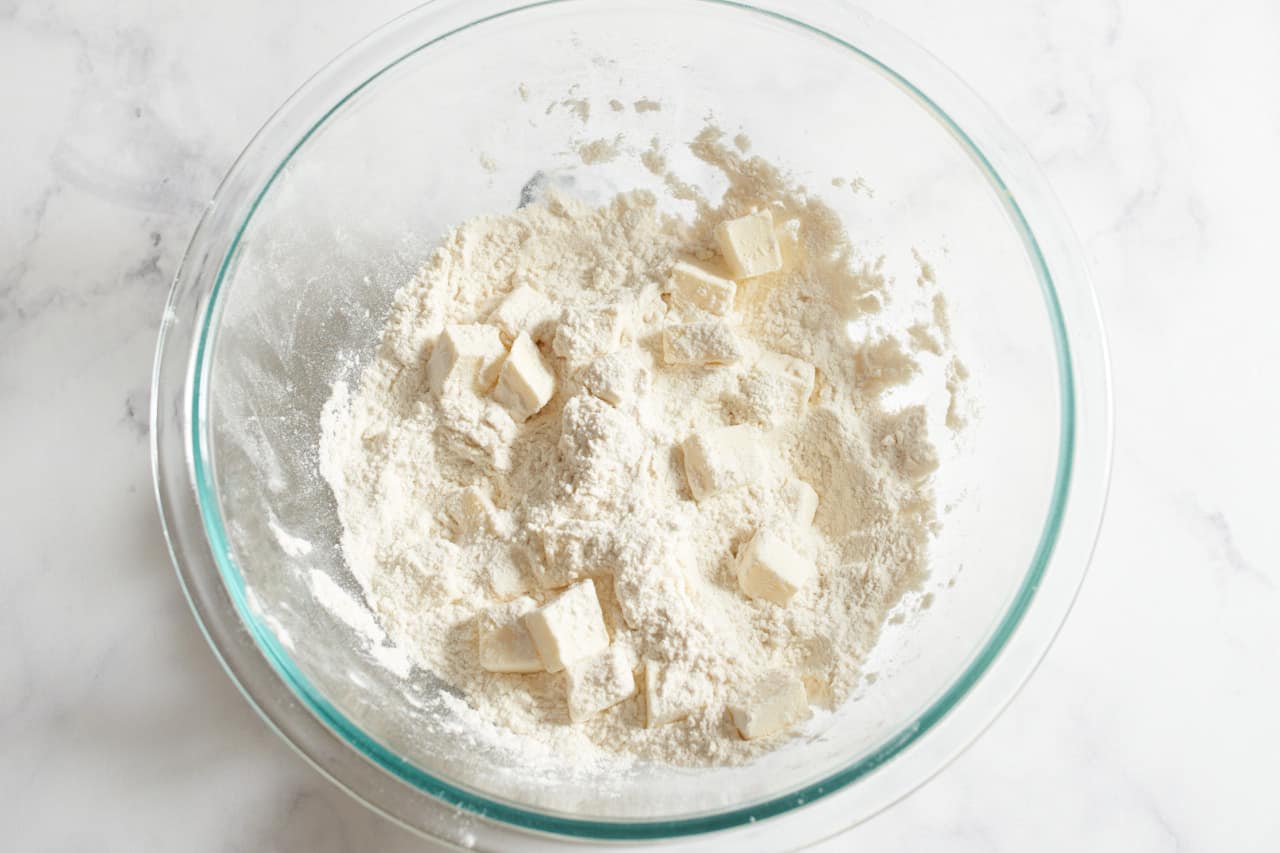
Drop the cold butter cubes into the flour mixture and toss to coat.
Use a pastry blender to work the butter into the flour until has a crumbly texture with pieces of butter the size of small peas.
You can also work the butter into the flour with your fingers. I find that a pastry blender is much easier and faster, and you have less risk of the butter melting too quickly.
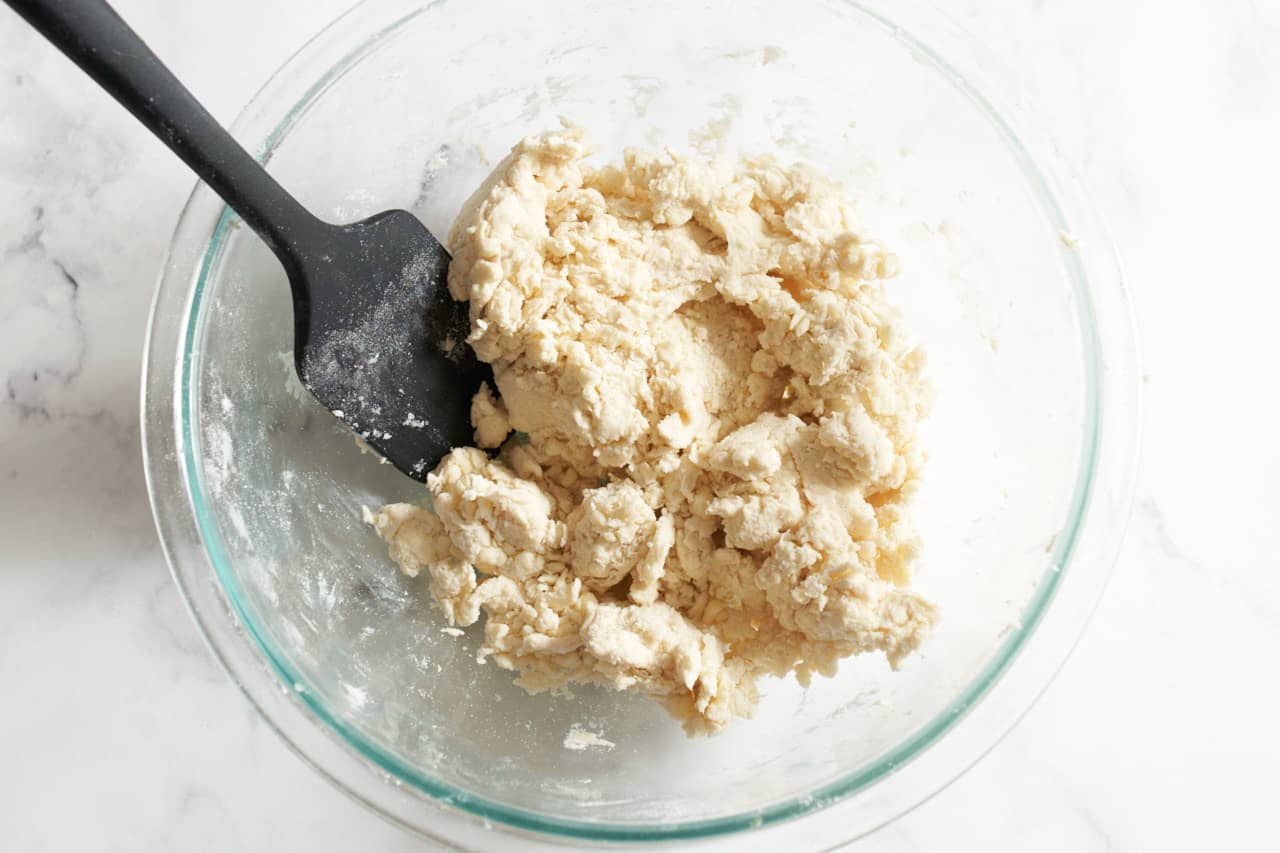
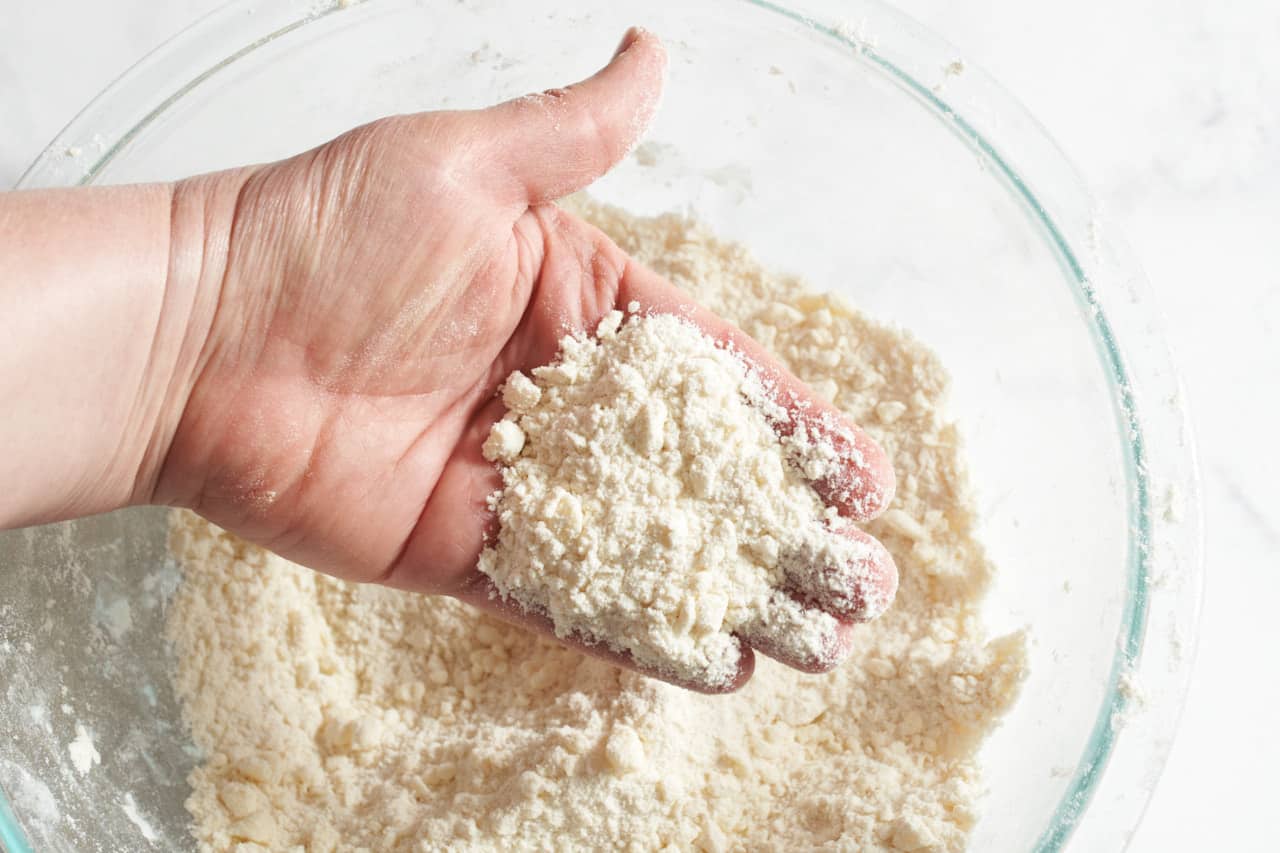
Add the sour cream and one tablespoon of the water to the mixture and gently bring it together with a spatula or wooden spoon.
Continue adding up to 3 more tablespoons of ice water one at a time, until a shaggy dough forms. It should hold together, but it shouldn't feel wet.
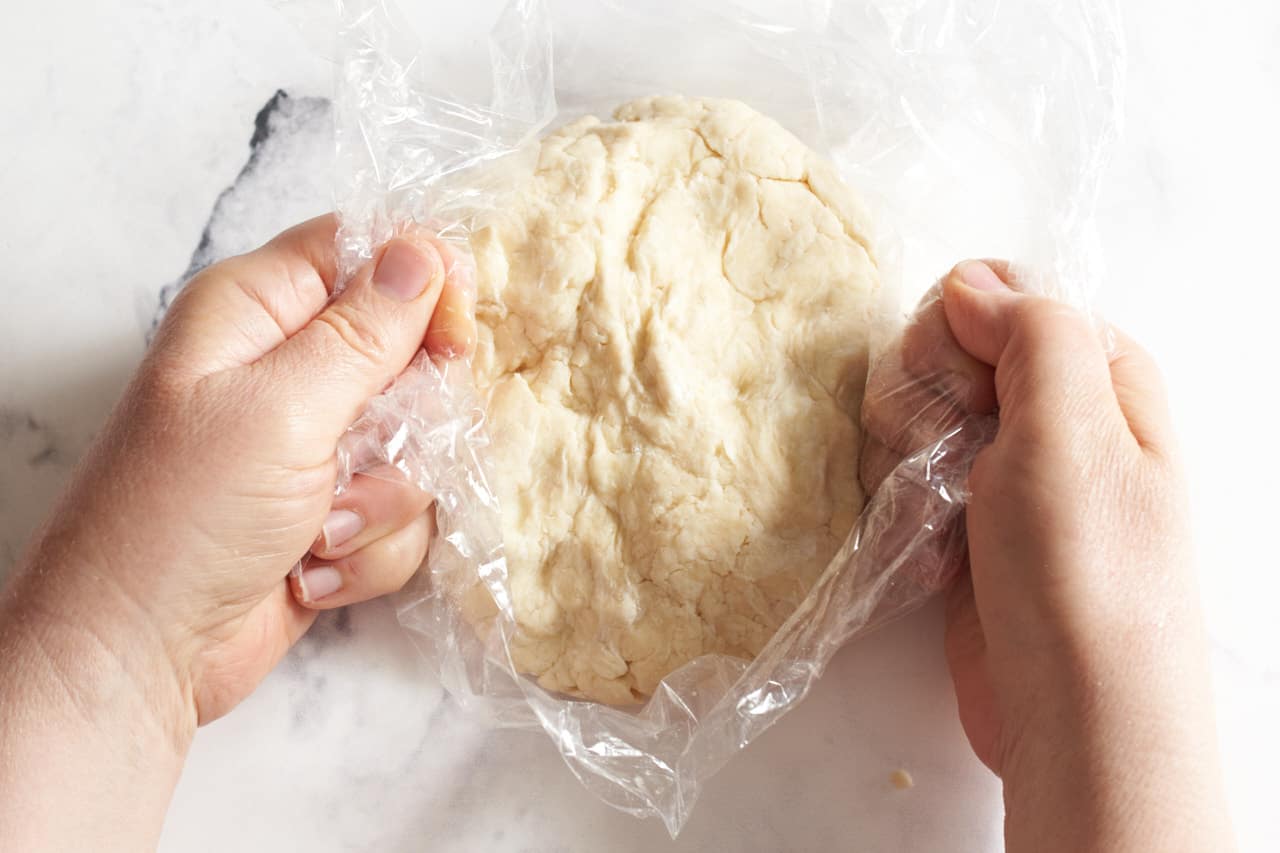
Turn the dough out onto the counter and bring it together with your hands or a bench scraper. Shape it into a disc and wrap it in plastic wrap. Refrigerate the dough for at least 2 hours.
Pro tip
I like to use a bench scraper to give the pastry a few turns to bring it together instead of using my hands. It helps to keep the dough from getting warm, and it creates flaky layers.
Step 2: Make the strawberry filling
Wait to make the filling until the dough is done chilling and you are ready to roll it out.
Want to save this recipe?
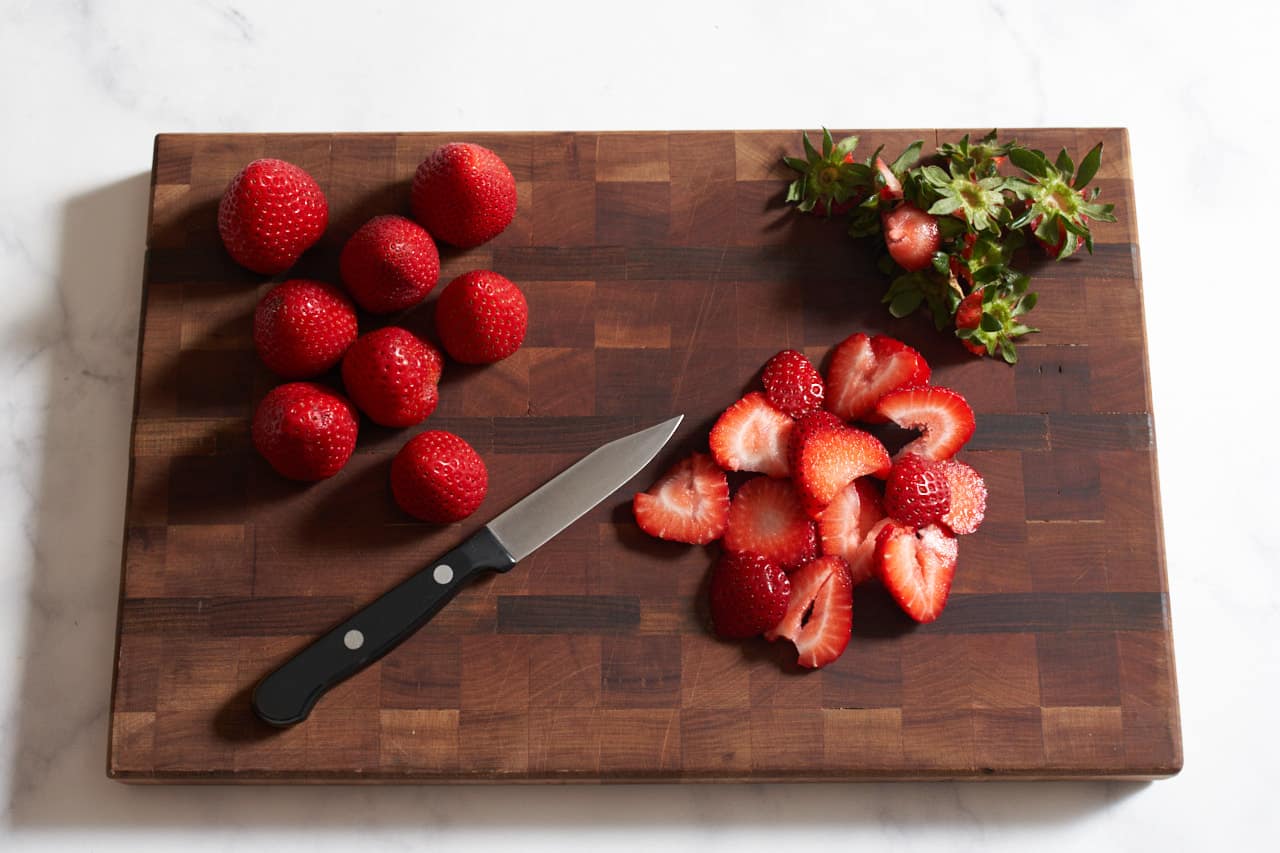
Hull the strawberries and cut them into ¼-inch slices.
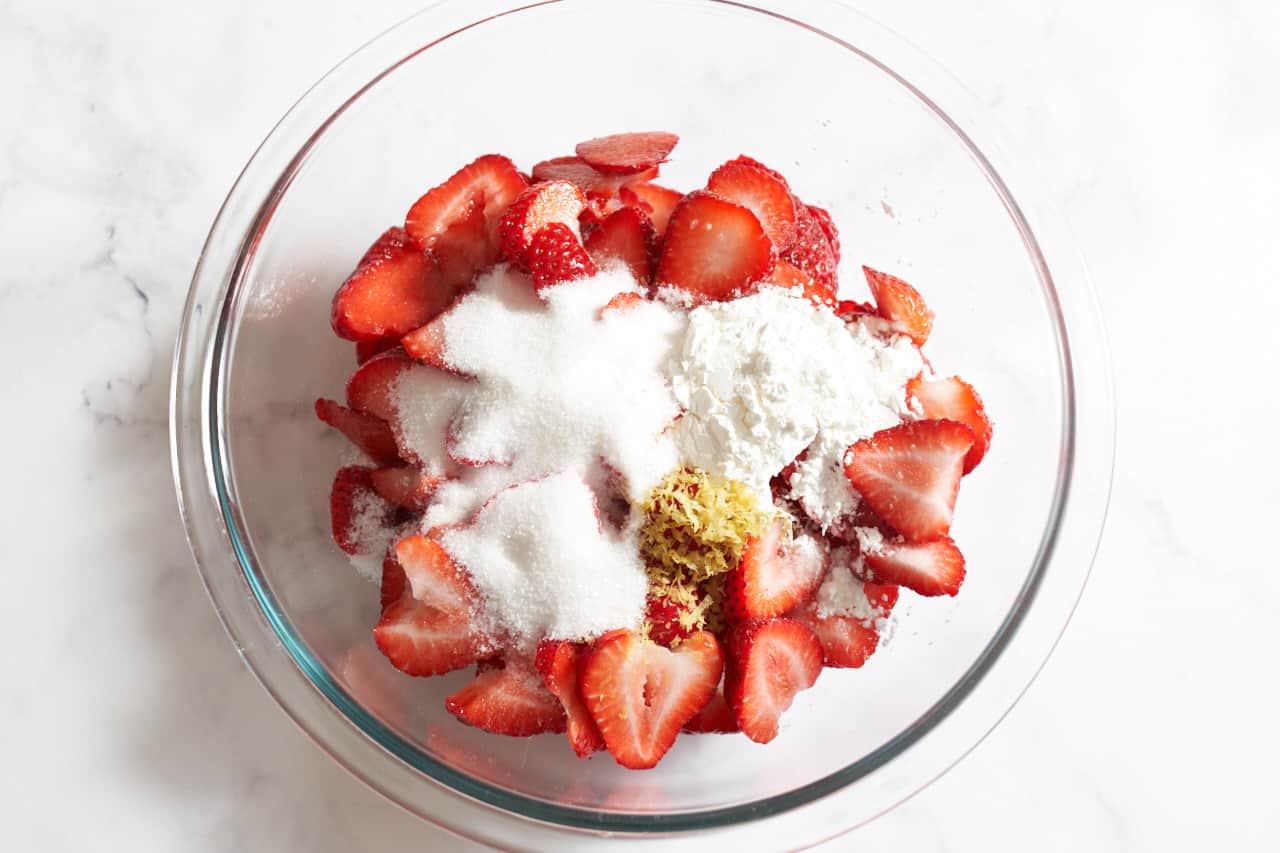
Add sugar, corn starch, lemon juice, and lemon zest to the berries.
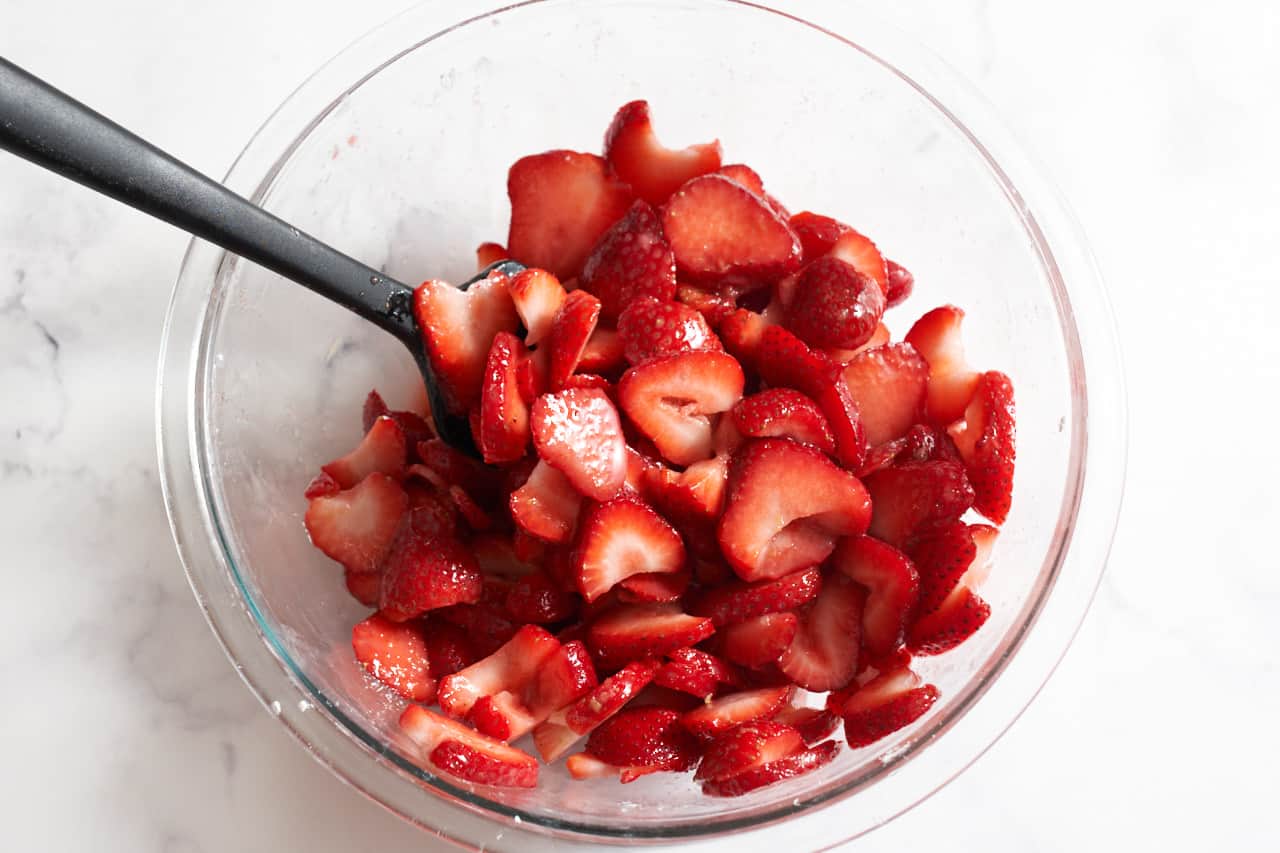
Stir to combine, making sure that there are no white spots of corn starch remaining. Set aside to macerate while you prepare the crust.
Whisk together the egg and water for the egg wash.
Step 3: Roll out the dough
Preheat the oven to 400 degrees F. Line a baking sheet with parchment paper.
Before rolling out the dough, remove it from the refrigerator and let it sit at room temperature for about 5 - 10 minutes to soften slightly.
- Place the disk of dough on a lightly floured surface, sprinkle a bit of flour on top, and flour your rolling pin.
- Gently roll the crust out in one direction with each stroke, not back and forth, and rotate the crust as you go to keep it from sticking. Add more flour to the surface if need be.
- Once the crust has reached about 14 inches in diameter, gently drape it over your rolling pin and transfer to the parchment paper. Leave the edges ragged, they'll get crispy as it bakes.
Pro tip
If the dough is too cold when you try to roll it out, it can crack and split. You'll know it's the right temperature when it's easy to roll out, but still feels cold to the touch.
Step 4: Assemble the galette
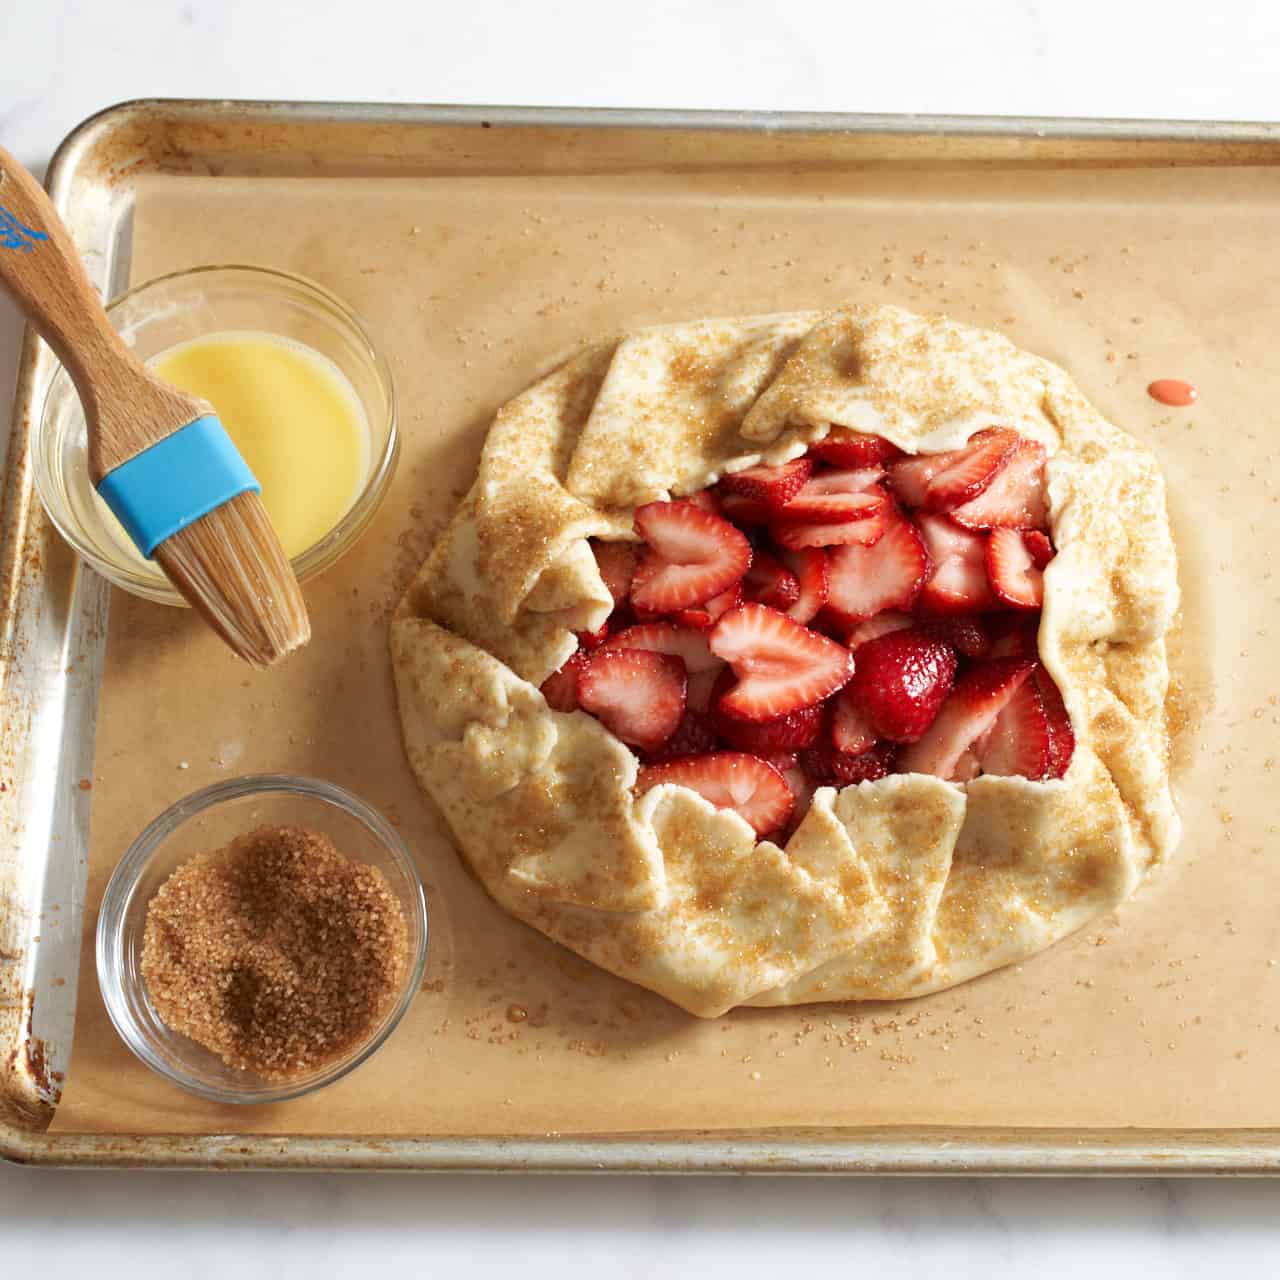
Give the strawberries a good stir to move the juices around, then pour them into the center of the galette crust, leaving a 2 or 3-inch border.
Gently fold in the edges of the crust around the strawberries, creating little pleats as you go around.
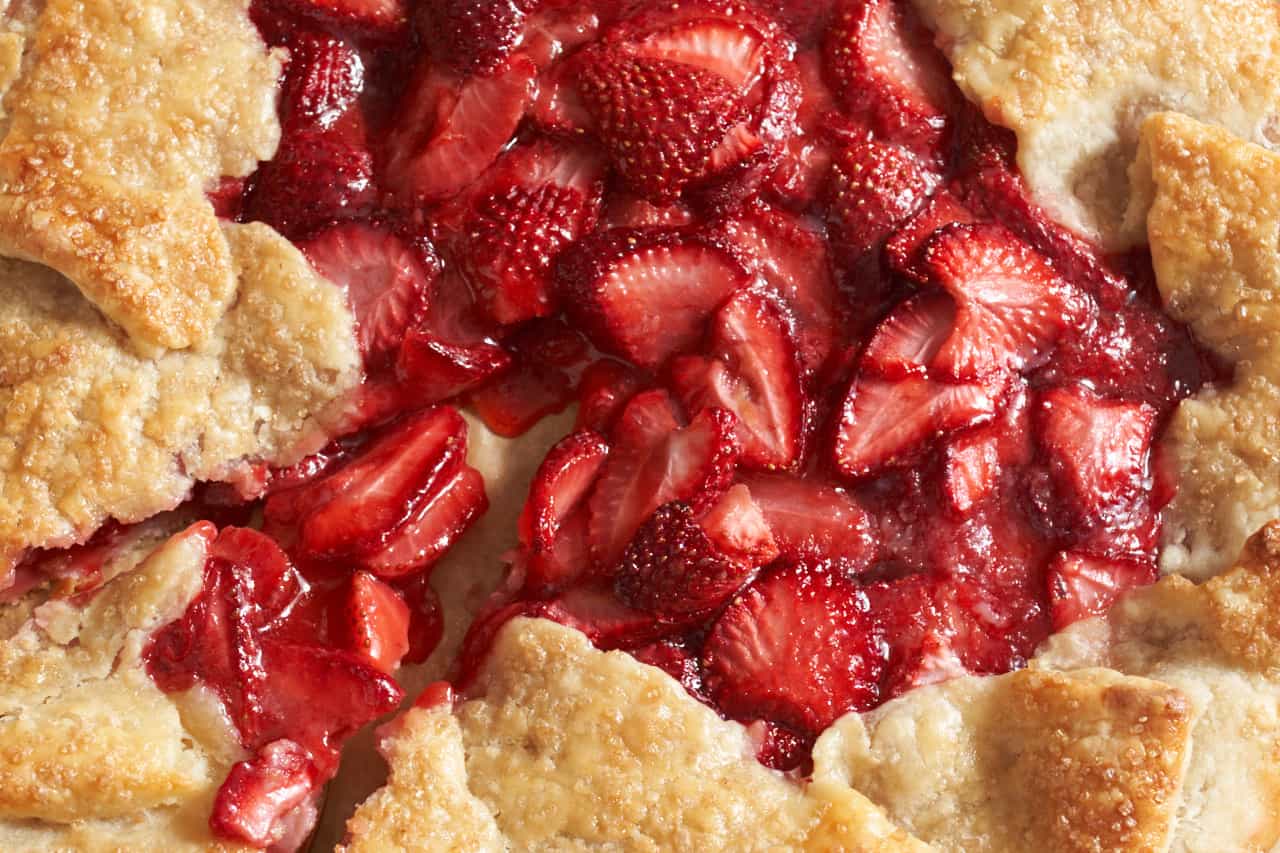
Brush the outside of the crust with egg wash and sprinkle the raw sugar over it. Bake for 30-35 minutes until the crust is golden brown and the juices are bubbling.
Let the strawberry galette to stand for at least 15-20 minutes before serving, or wait until it has come to room temperature, to allow the filling to set up.
Expert tips
- The keys to a flaky, buttery galette crust: Keep the butter cold, and work the dough as little as possible.
- The rolled out dough doesn't have to be perfectly round: Can't get your dough rolled into a perfect circle? No worries, ovals are fine! They taste just as good as circles!
- If your kitchen is very warm and your dough is starting to feel really warm as you roll it, pop it back into the refrigerator for 10-15 minutes or so. You don't want the butter to be melted before you get it into the oven.
- Don't stress about folding galette crust around the strawberries in some sort of perfect way. The crust is supposed to look rustic. Fold it with pleats, make it flat sided, make it rounded—as long as it is holding the strawberries and their juices without cracks, you are good to go.
- Do not be tempted to stuff this galette with too many strawberries. Believe me, I tried. The dough to fruit ratio is perfect in this recipe. If you try to add more fruit, the crust will not be able to hold the juices, trust me, I tested it!
- Baking at a higher temperature seals the crust: Yes, we are baking this strawberry galette at 400 degrees F, a hotter temperature than you might expect. This helps to seal the crust quickly so it keeps its shape and stays crispy.
- It's okay if your galette leaks a little bit: That is part of the charm. However, if it is leaking a LOT—like all the juice ran out and is burning on the parchment—then you've got a problem with your crust: It may have been too warm, so the butter melted too fast and let the liquid run out. If it's too cold it can break and crack. If it's too wet, it won't set fast enough to hold the liquid. If it's too dry, it could split open.
Make ahead, storage and leftovers
- Make ahead: A strawberry galette is best the day it is made, but it can last another day if necessary. If you really want to make it ahead, I would suggest that you don't do the egg wash and turbinado sugar on the crust. The sugar will start to absorb moisture and soften the edges of the crust. The unbaked dough can be made up to two days ahead and stored in the refrigerator.
- Storage: If you have leftovers, cover the galette loosely with foil and keep at room temperature in a cooler place in your kitchen, just as you would a fruit pie, for up to two days.
How to serve a strawberry galette
Make sure to let the galette cool for 15-20 minutes to allow the jammy strawberry filling to set up. After that, you can serve it warm or at room temperature. It's a great to serve for Memorial Day weekend or as a fun 4th of July dessert.
I personally like this strawberry galette exactly as is, no accoutrements. But you can top it with whipped cream, serve it with vanilla ice cream, or go double strawberry and put some strawberry ice cream on the side.
FAQ
There's really no difference, it's just about choosing the pie dough recipe you want to use. I've chosen to use a sour cream pie dough for this strawberry galette dough because it is very easy to work with. You can use all-butter pie dough, you can use a dough that has cornmeal in it, one that has cream cheese in it, etc. If you have a favorite pie crust recipe that you know and love and are a pro at making, use that one!
First, bake the galette at a higher temperature which will help to seal the crust quickly and keep the bottom crisp. There are a couple of other tricks you can try: 1. Brush the bottom of the crust with egg white to create a seal. 2. Add semolina flour or almond flour to the bottom of the galette before adding the strawberries. BUT—this will actually absorb some of the liquid, so you may not have as gooey a filling as you would like.
I don't recommend using frozen strawberries. Freezing weakens their structure, and they release too much of their water, leaving your filling watery, instead of jammy and gooey.
More strawberry recipes
- Strawberry scones will make your weekend breakfast dreams come true!
- A Strawberry Arugula Salad proves that strawberries aren't just for desserts.
- Whip up a batch of Strawberry Compote when you have oodles of strawberries hanging around.
Strawberry galette is an easy spring and summer recipe that anyone can make!
- Make it at the peak of strawberry season for amazing flavor!
- We'll use a flexible, tender galette dough made with sour cream that even beginner bakers can make with ease.
- Minimal prep, and bakes in about 30 minutes.
- A strawberry galette has a beautiful, rustic look, and a tempting, jammy filling, so there's no need to worry about perfection. Let it be a lazy summer situation.
- Once you learn how to make this one, you'll be able to easily make other galette variations.
If you enjoy this recipe, please leave me a 5-star rating in the recipe card! It really helps others find my content and helps my business grow! Sign up for my newsletter for recipes delivered to your inbox and follow me on Instagram and Pinterest! Thank you!
Recipe

Jammy Strawberry Galette Recipe
Want to save this recipe?
Equipment
- kitchen scale optional
- bench scraper optional
Ingredients
Galette Dough
- 165 grams all-purpose flour about 1⅓ cup
- 1½ teaspoon granulated sugar
- ¼ teaspoon kosher salt
- 8 tablespoon unsalted butter one stick
- ¼ cup full-fat sour cream
- 4 tablespoon ice water You may not need all of it
- 1 egg + 1 teaspoon water for the egg wash to brush on the crust
- turbinado (raw) sugar for sprinkling on the edge of the crust before baking
Strawberry Filling
- 18 ounces fresh strawberries about 3½ cups once sliced
- ¼ cup granulated sugar
- 1½ tablespoon corn starch
- 1 tablespoon lemon juice
- zest of one lemon
Instructions
Galette Crust
- Cut the butter into cubes and pop it into the freezer for 5 - 10 minutes. Meanwhile, whisk the flour, salt, and sugar together.
- Drop the cold butter cubes into the flour mixture and toss to coat. Use a pastry blender to work the butter into the flour until has a crumbly texture with pieces of butter the size of small peas.
- Add the sour cream and one tablespoon of the water to the mixture and gently bring it together with a spatula or wooden spoon. Continue adding up to 3 more tablespoons of ice water ONE AT A TIME, until a shaggy dough forms. It should hold together, but it shouldn't feel wet.
- Turn the dough out onto the counter and bring it together with your hands or a bench scraper. Shape it into a disc and wrap it in plastic wrap. Refrigerate the dough for at least 2 hours.
Strawberry Filling
- **Wait to make the filling until the dough is done chilling and you are ready to roll it out.**
- Hull the strawberries and cut them into ¼-inch slices.
- Add sliced berries to a large bowl along with the sugar, corn starch, lemon juice, and lemon zest. Stir to combine, making sure that there are no white spots of corn starch remaining. Set aside to macerate while you prepare the crust.
Roll out the dough
- Preheat the oven to 400 degrees F. Whisk together the egg and water for the egg wash.
- Line a baking sheet with parchment paper. Before rolling out the dough, remove it from the refrigerator and let it sit at room temperature for about 5 - 10 minutes to soften slightly.
- Place the disk of dough on a lightly floured surface, sprinkle a bit of flour on top, and flour your rolling pin. Gently roll the crust out in one direction, not back and forth, and rotate the crust as you go to keep it from sticking. Add more flour to the surface if need be.
- Once the crust has reached about 14 inches in diameter, gently drape it over your rolling pin and transfer to the parchment paper. Leave the edges ragged, they'll get crispy as it bakes.
Assemble the galette
- Give the strawberries a good stir to move the juices around, then pour them into the center of the galette crust, leaving a 2 or 3-inch border. Gently fold in the edges of the crust around the strawberries, creating little pleats as you go around.
- Brush the outside of the crust with egg wash and sprinkle the raw sugar over it. Bake for 30-35 minutes until the crust is golden brown and the juices are bubbling.
- Let the strawberry galette to stand for at least 15-20 minutes before serving, or wait until it has come to room temperature, to allow the filling to set up.
Notes
- You can work the butter into the flour with your fingers, but I find that a pastry blender is much easier and faster, and you have less risk of the butter melting too quickly.
- I like to use a bench scraper to give the pastry a few turns to bring it together instead of using my hands. It helps to keep the dough from getting warm, and it creates flaky layers.
- Can't get your dough rolled into a perfect circle? No worries, ovals are fine! They taste just as good as circles!
- It's okay if your galette leaks a little bit. That is part of the charm. However, if it is leaking a LOT—like all the juice ran out and is burning on the parchment—then you've got a problem with your crust: It may have been too warm, so the butter melted too fast and let the liquid run out. If it's too cold it can break and crack. If it's too wet, it won't set fast enough to hold the liquid. If it's too dry, it could split open.
- Be sure to read the post above for more tips and tricks!

Emily B.
This recipe was beautifully decadent with little fuss. Our family devoured it and we all felt special enjoying this summer treat. The lemon and strawberry combo was sublime. Thank you Debra!
Debra
Aw, Emily!
This comment warms my heart. I'm so glad the whole family loved it. Strawberries are special and they do make you feel special! Yay!
Thanks for reading and cooking my recipes,
Debra