Pampushky are delicious yeast rolls from Ukraine that are topped with an herb and garlic oil. Also known as Ukrainian garlic bread, they're served at practically every meal. I'm excited to share some of my Ukrainian heritage with you through this easy bread recipe!

This pampushky recipe is proof that anyone can make bread! Proof, get it? But really, I mean it. Every Ukrainian family has their own method for making pampushky. My recipe uses a starter, which means we will feed the yeast some flour and let it start doing its thing in the refrigerator overnight.
This process makes bread baking much easier, because then all you have to do is finish the dough and shape it into rolls for one more rise before baking. Once you see how easy it is to make them, you'll be serving these dinner rolls every chance you get.
Pampushky bake up round and plump, they have a soft, fluffy texture and a sweet, yeasty flavor that's balanced by the garlic oil. For an authentic meal, be sure to serve them with some of my other Ukrainian recipes like Borscht or Deruny (Ukrainian potato pancakes), or alongside my favorites from grandma's house growing up—Holubtsi (Ukrainain Cabbage Rolls) and Varenyky, which are Ukrainian potato-filled dumplings.
Jump to:
What is pampushky?
Pampushky are Ukrainian garlic bread rolls (pampushky is plural, the singular form is pampushka) that are ubiquitous on every family table. They're served with soups and stews like borscht, alongside roasted meats, pretty much anywhere there's a sauce to sop up with bread, you'll find pampushky.
There are two methods for making them, the more well-known double proof method of making rolls, when you make the dough, let it rise, then form them into balls and let them rise again.
But we are going to use the overnight starter method, which I find much easier, and much more reliable in terms of getting the pampushky to rise perfectly every time. It also intensifies the sweet, yeasty flavor of the garlic rolls.
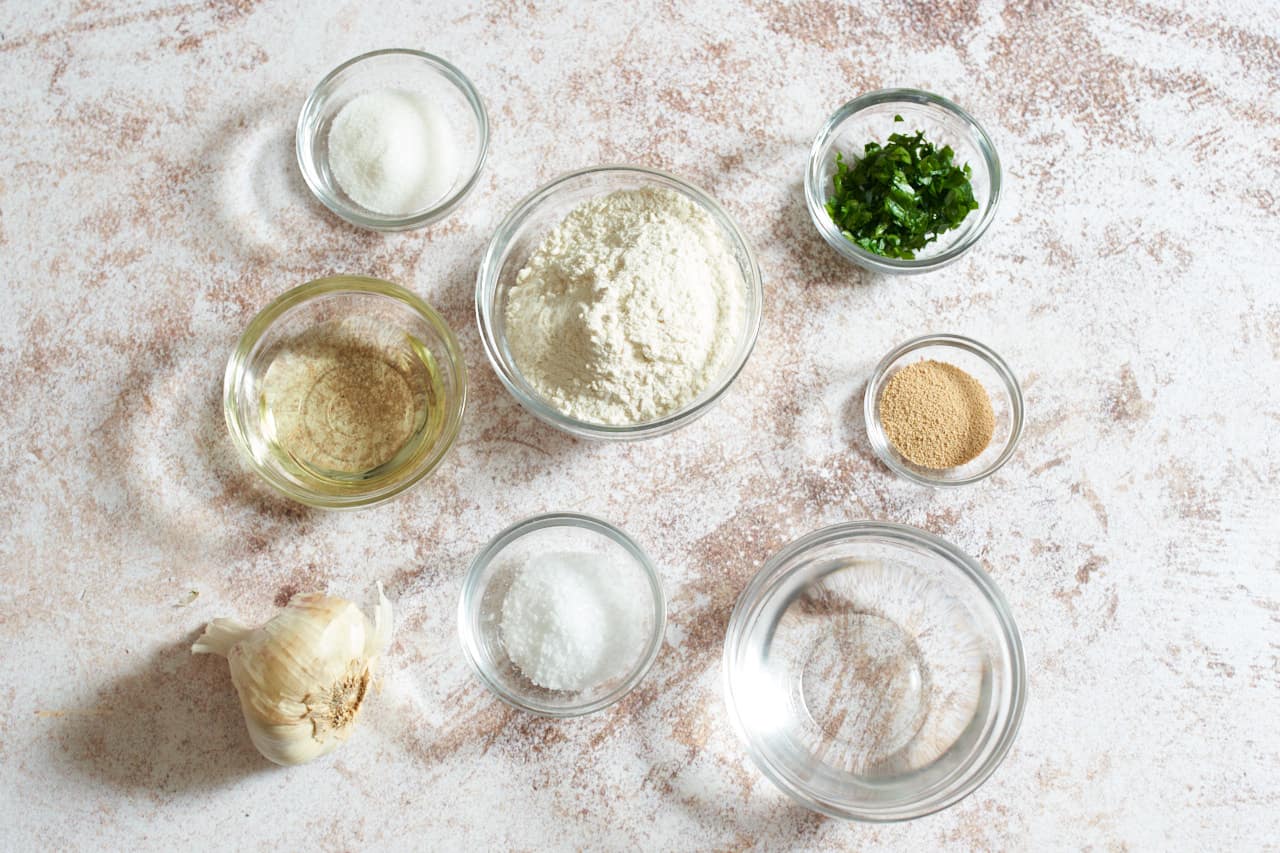
Ingredients you'll need
Ukrainian garlic bread is a surprisingly simple recipe. All you need are a few pantry staples and you're in business.
- All purpose flour: I find AP flour works just fine, no need for bread flour.
- Kosher salt: To season the dough before it bakes.
- Active dry yeast: Fresh yeast is the key to a fluffy pampushka so make sure to check that expiration date!
- Warm water: To activate the yeast.
- Sunflower oil: A key ingredient in many Ukrainian recipes that will give you the most authentic, traditional flavor. I get mine at Trader Joe's, you can also find it at Whole Foods and online. In a pinch, substitute olive oil.
- Egg: We'll beat an egg to brush on top of the rolls before they bake, which will give them a shiny, golden, crisp crust.
- Garlic cloves: I love a ton of garlic on top, use as much or as little as you like.
- Parsley: You can also use additional herbs, a mix of parsley and dill is quite nice, or use only dill, or get really fancy and add another soft herb like tarragon.
- Flaky sea salt: Optional, to sprinkle on top of the rolls after adding the garlic-oil mixture. I like Maldon, but you can just use more kosher salt if you prefer.
How to make pampushky
Recipe adapted lightly from the cookbook, Mamushka: Recipes from Ukraine and Eastern Europe by well-known Ukrainian chef Olia Hercules.
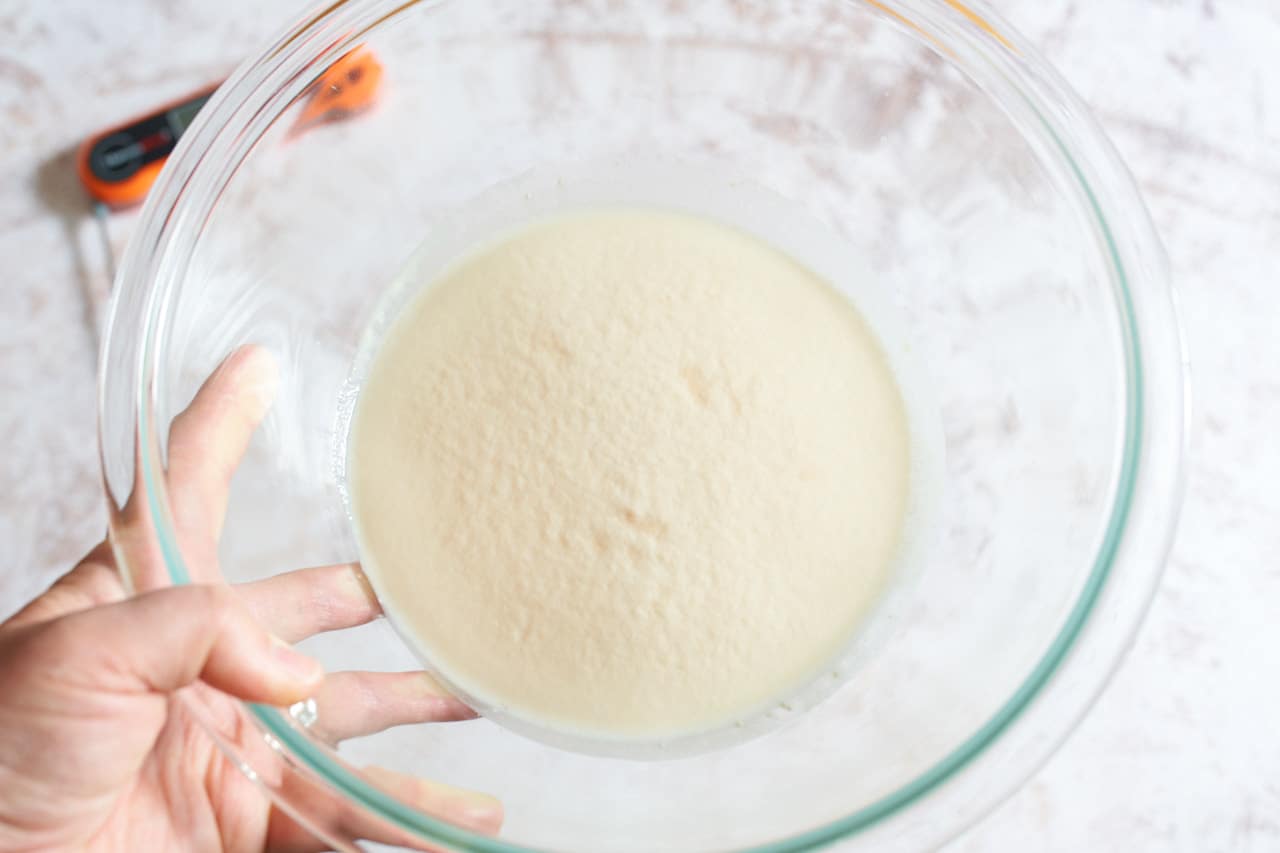
Step 1: Make the overnight starter (also called a sponge)
Add the yeast and sugar to a large bowl. Add the warm water (between 110 and 115 degrees F), and whisk to combine. Let the mixture sit for 10-15 minutes to allow the yeast to foam up.
If the yeast doesn't get foamy, it's no longer alive. Buy some new yeast and start again.
Prep Tip
To ensure the water is the right temperature, I warm it in the microwave in 10-15 second increments. I use a meat thermometer to check the temperature of my water. If the water is too cold, the yeast won't wake up. If it is too warm, you'll kill the yeast.
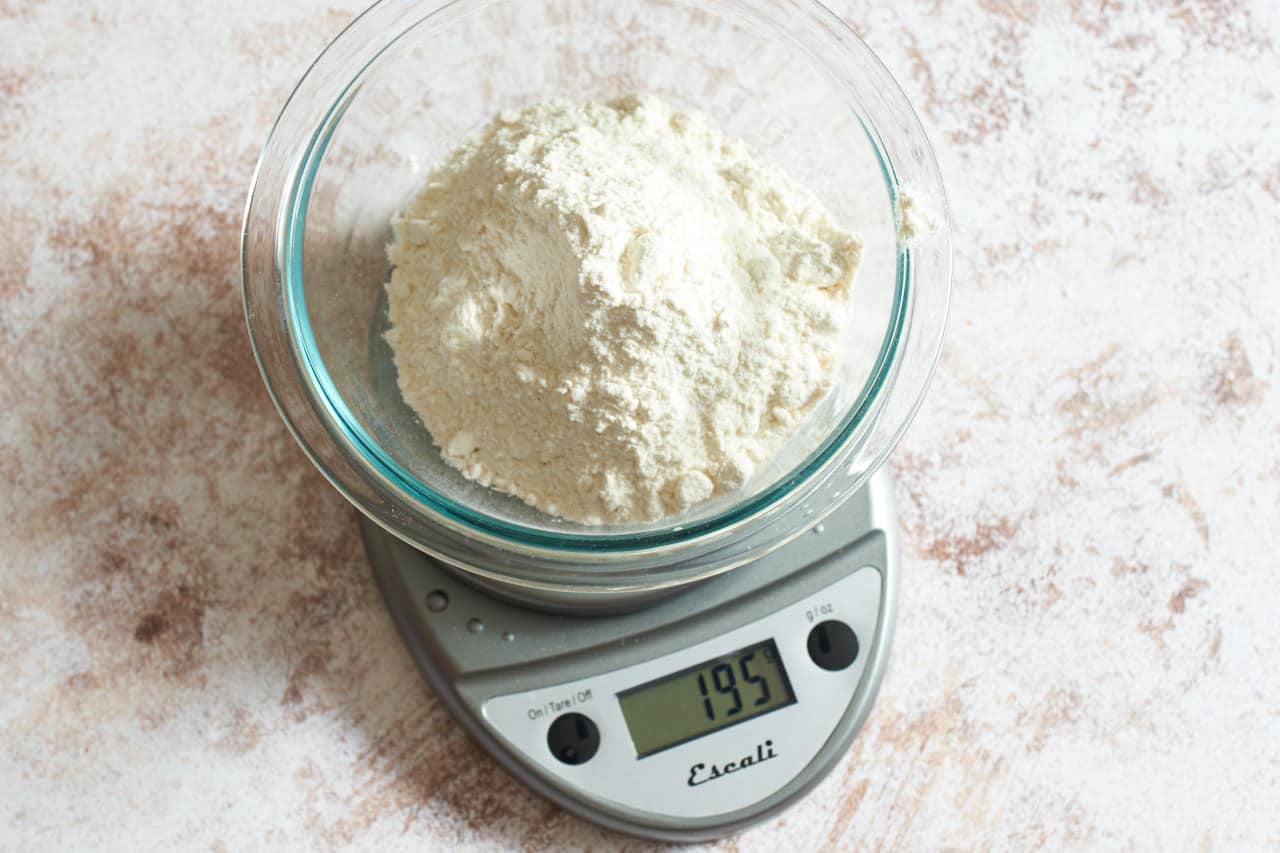
Add half of the flour to the yeast mixture (be sure to use a kitchen scale to weigh it for accuracy) and gently combine. Cover tightly with plastic wrap, and place in the refrigerator overnight.
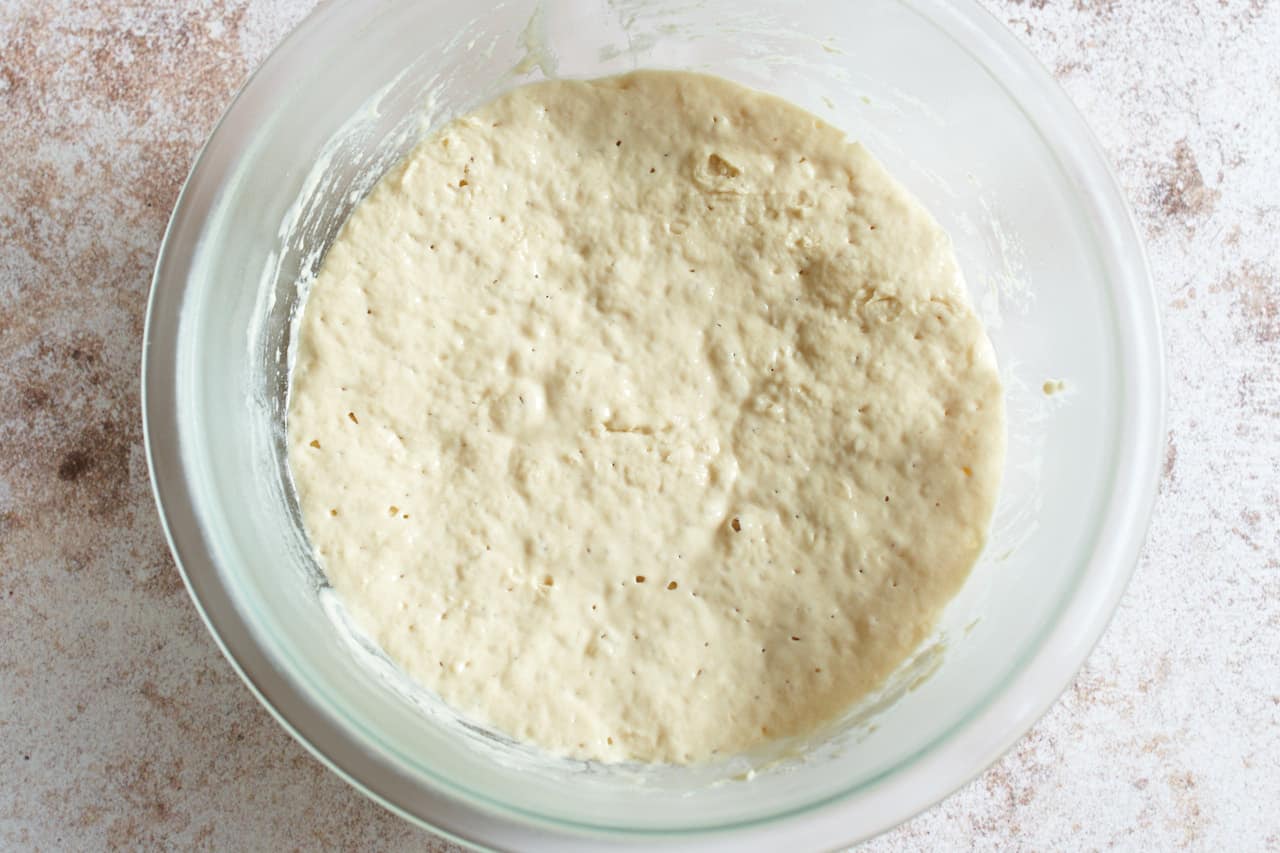
When you check on your starter the next day, it will have doubled in size and it will have all kinds of air bubbles in it!

Step 2: Add flour and salt to the starter
Whisk together the remaining flour and the kosher salt and add it to the starter.
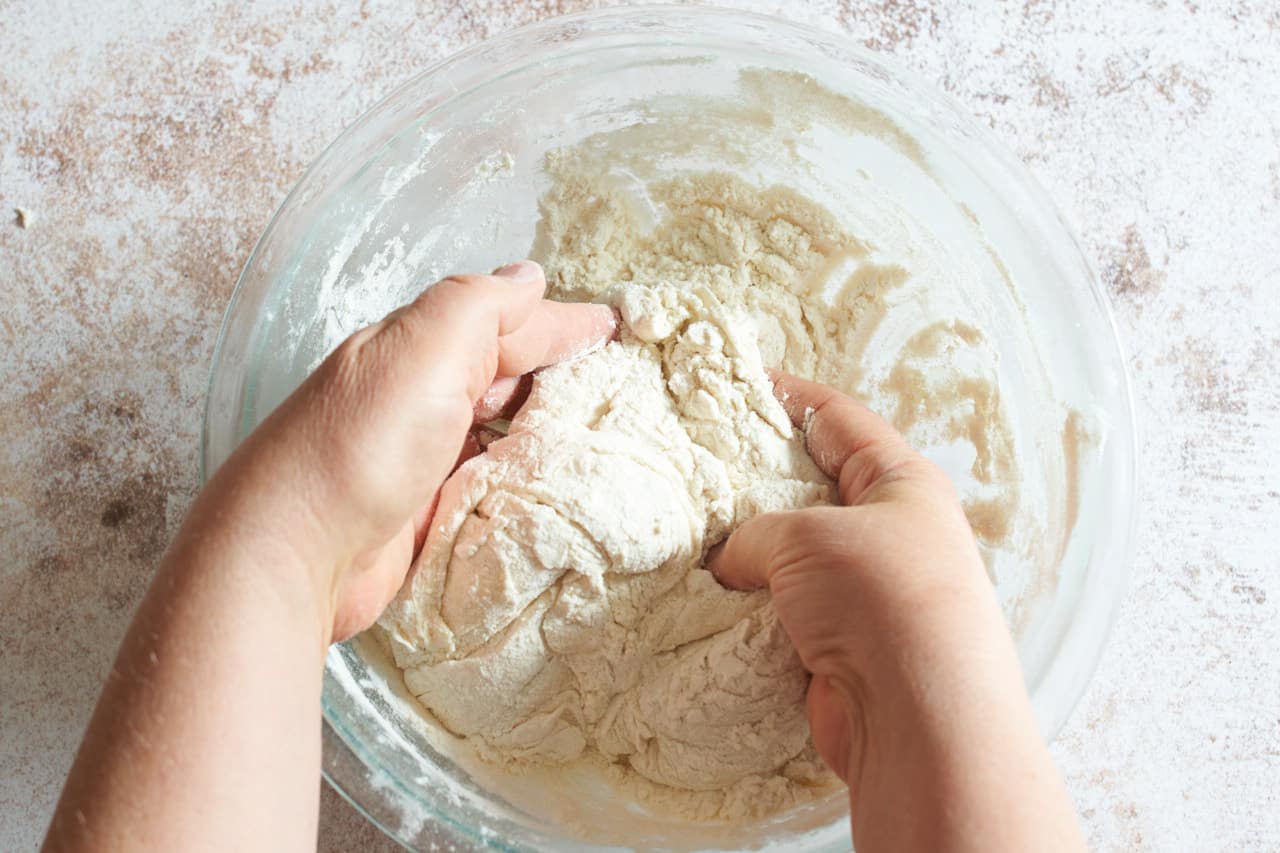
You can start with a spatula, but then you'll need to use your hands to gently work the flour into the dough.
Want to save this recipe?
You'll join hundreds of readers on my email list!
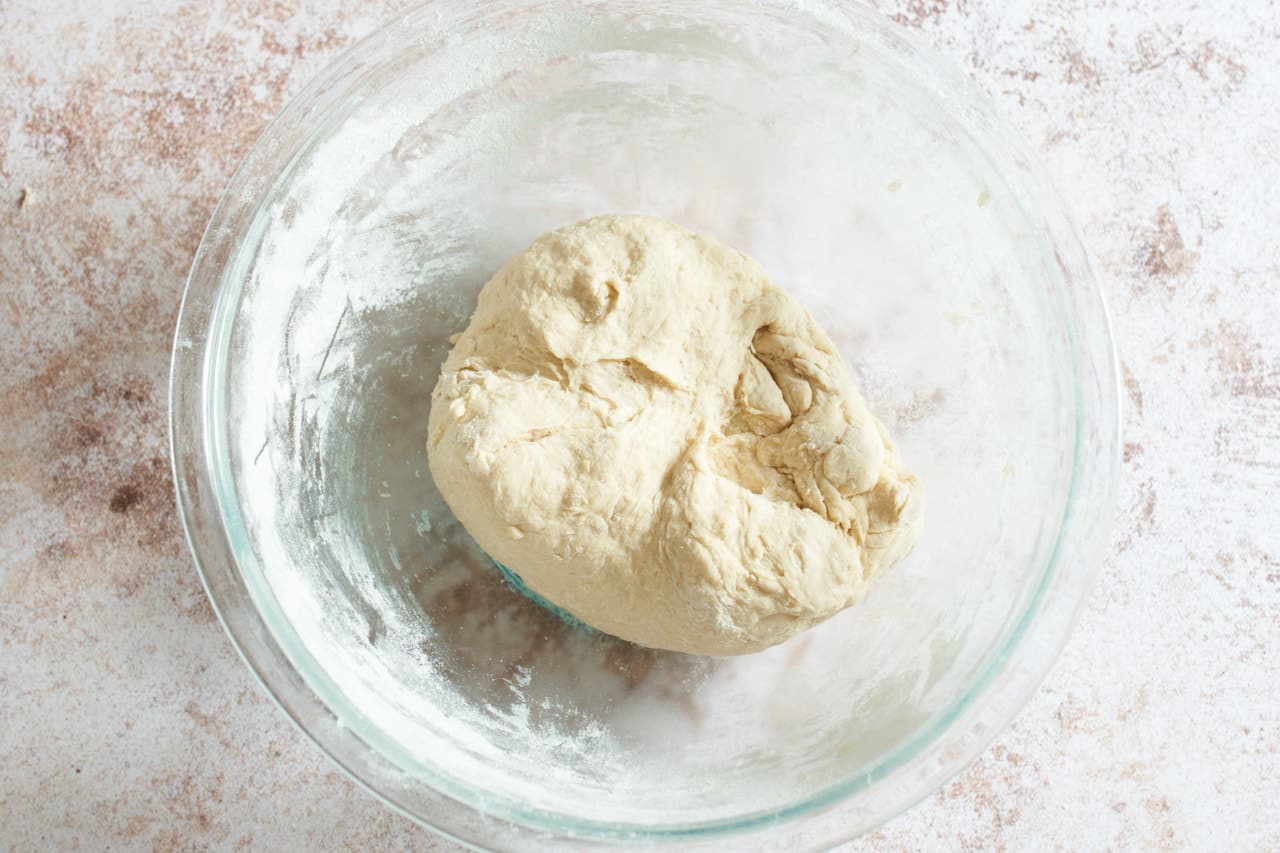
Keep working the dough in the bowl with your hands until all of the flour has been incorporated and you have a rough ball of dough.
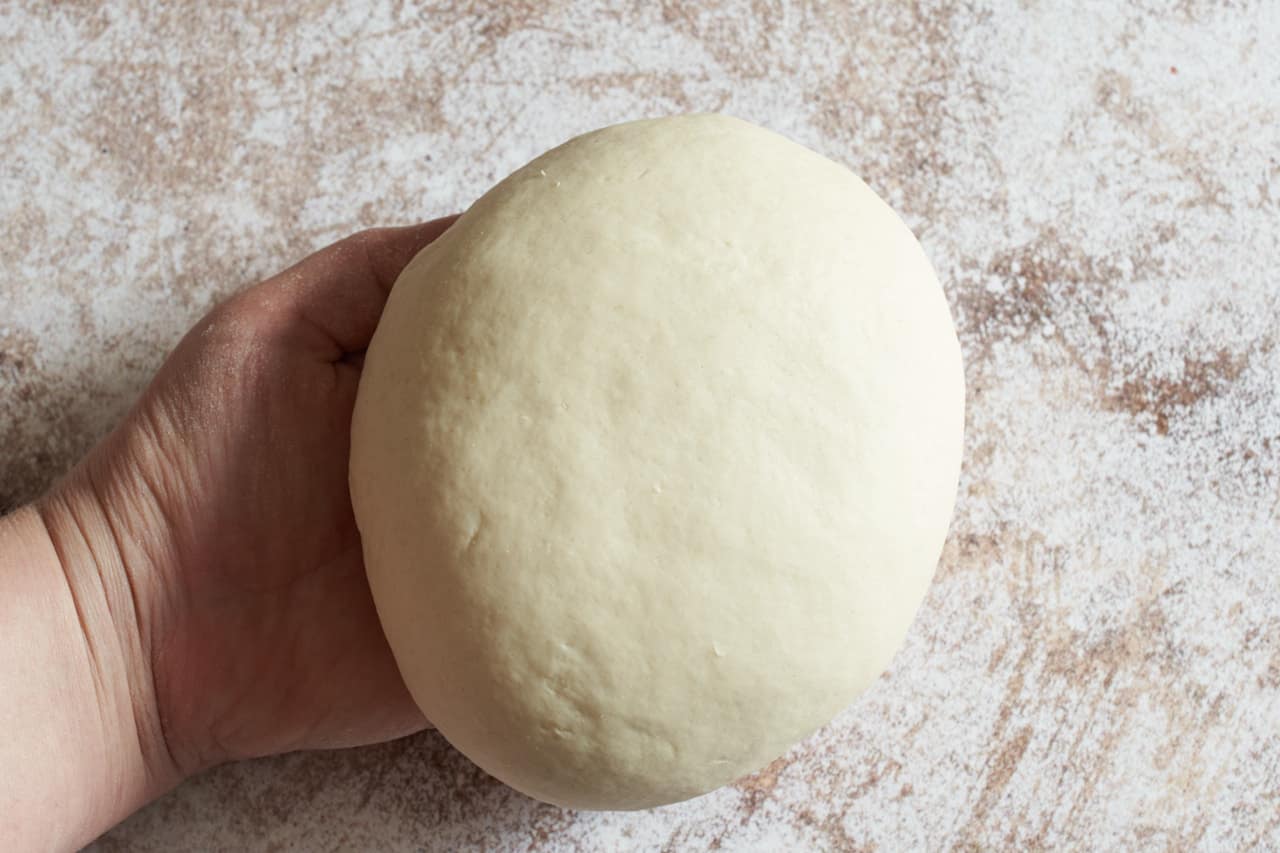
Step 3: Knead the dough and form the pampushky rolls
On a lightly floured work surface, knead the dough until it is smooth, no longer sticking to your hands, and the gluten is well-developed, around 10-12 minutes. (See tips below.) Add a bit more flour to your surface as you go when necessary.

Divide the dough into 8 pieces. I like to use a bench scraper to do this.
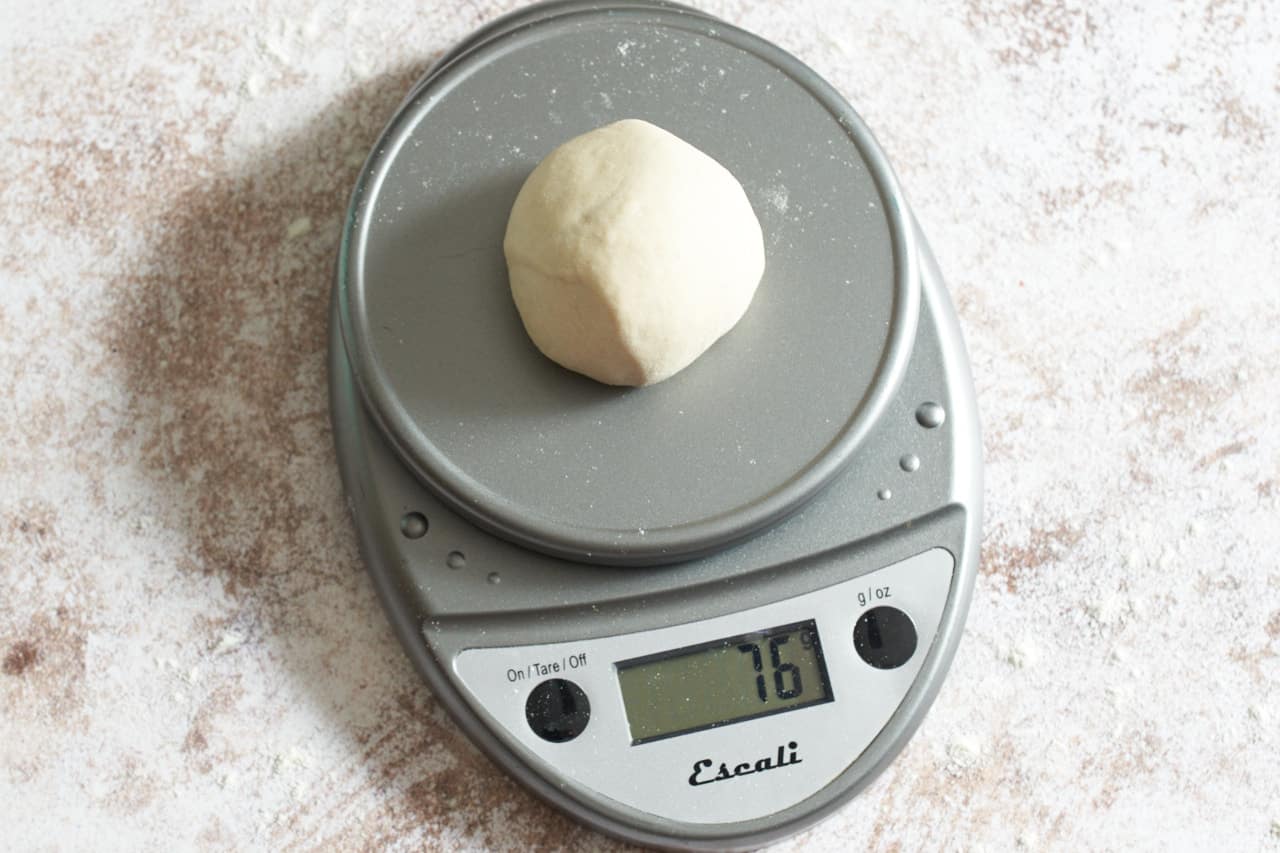
For evenly-sized pampushky, use your kitchen scale again to make sure each one weighs about the same, usually around 75-76 grams.
Roll the dough between your hands to form round balls that are smooth on top.
Pro tip
You may have to knead the dough balls a little bit at this point to get a nice, round, smooth shape. It's fine to squeeze them a little and reform them, just don't overdo it.

Add 1 tablespoon of the sunflower oil to an 8-inch cast iron skillet or 8-inch cake pan.
Place one pampushka in the center of the pan, then make a circle around it with the remaining 7 dough balls.

Step 4: Let the pampushky rise, then bake!
Place the skillet in a warm place covered loosely with a kitchen towel and wait for the dough to rise, anywhere from 1 to 3 hours. (See tips below.) The rolls should be double in size and joined together along the sides and in the center.
Preheat the oven to 425 degrees F. Beat the egg and set it aside.
Once the pampushky have risen, gently brush the tops of all the rolls with the beaten egg. Pop them in the oven and bake for 25-30 minutes until the tops are golden brown.
Step 5: Make the herb and garlic oil
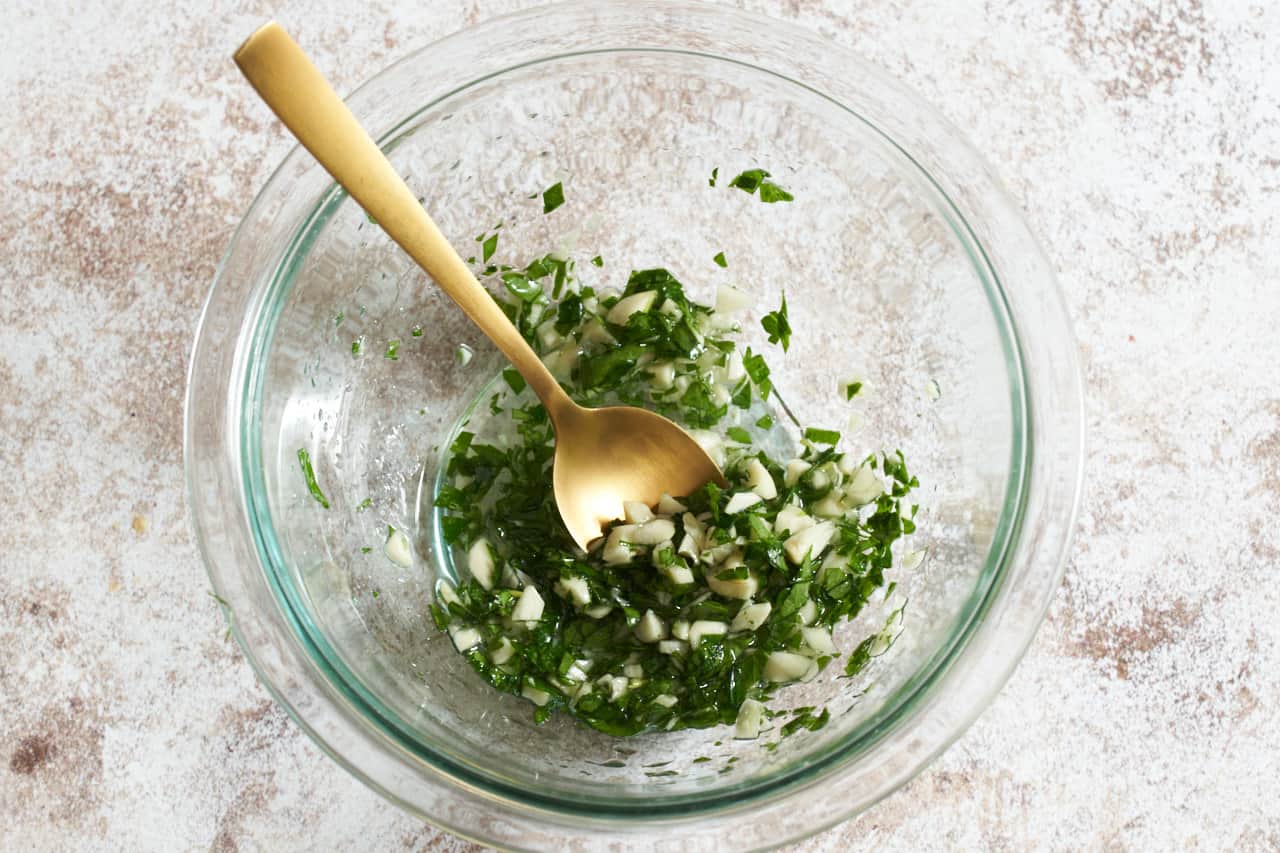
While the pampushky bake, chop the garlic cloves and parsley, and add them to the sunflower oil. Set aside at room temperature until the rolls are done.
Step 6: Top the pampushky with garlic oil and serve!
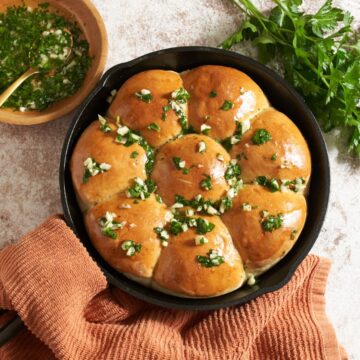
As soon as the pampushky come out of the oven, drizzle them with the garlic-herb oil so they can soak in that flavor while they're hot! Serve immediately with more garlic oil on the side.

Tips for foolproof pampushky
- It's essential that you use a kitchen scale to weigh your flour. The amount of flour scooped into measuring cups can vary wildly each time depending on how packed down the flour happens to be.
- Pan size is important! Using an 8-inch cast iron skillet or 8-inch round cake pan will ensure that the dough balls rise the perfect amount, without being under or over-proved.
- You may have to knead the pampushy dough for anywhere from 8 to 14 minutes. I usually find that 10 - 12 minutes is the sweet spot as long as the kitchen isn't too cold.
- The time it takes for pampushky to rise once you've shaped them is going to depend on several things, including the activity of the yeast and the temperature of your kitchen. On average, it will take 2 - 3 hours. We're using a cold starter straight from the refrigerator, so if your kitchen is cold, the dough balls could still be a bit cold even after kneading for a while. The colder they are, the longer it will take to rise. If your kitchen is warm, you'll get results faster. I preheat the oven to warm up the kitchen, then turn it off until it's almost time to bake. I put the pan of pampushky in a warm spot on the counter near the oven covered with a towel.
- Be sure to let the yeast bubble up in the water/sugar mixture for 10 minutes. If you mix in the flour too soon, the yeast won't fully activate and the pampushky won't rise as much.
- Your warm water should be between 110 and 115 degrees F to activate the yeast, but not kill it. I usually shoot for 112 degrees.
Storage
Pampushky taste best the day they are made, but if you have leftovers, wrap them tightly in foil and store at room temperature for up to 2 days.
FAQ
You can leave the starter for the pampushky rolls in the refrigerator for 8 - 16 hours. I usually end up leaving mine in for about 12 hours.
Once baked, pampushky freeze well. Store them in a freezer-safe bag or container for up to two months. To reheat, let them thaw overnight in the refrigerator, then wrap in foil and bake in the oven at 300 degrees F until warmed through.
You can change up the herbs, and use any soft herb that you like. You can swap in green garlic for the regular garlic if you can find it. You could bake them with topped poppy seeds. They would also taste great slathered with honey butter!
More Eastern European recipes
- Creamy Cucumber Salad is refreshing all year round and it's so simple to make!
- Sheet Pan Chicken and Cabbage gets inspired flavor from cumin, caraway, and fennel seeds as it roasts.
- Hungarian Chicken Paprikash is a classic! Dip some Pampushky into the sauce to sop it up!
Pampushky is traditional Ukrainian garlic bread that's easy to make!
- Pampushky is an easy recipe, made with just a handful of simple ingredients.
- Overnight starter method ensures that the rolls rise high and fluffy every time.
- Serve Ukranian garlic bread with everything from chicken soup to borscht to braised meats.
- They're dairy-free!
If you enjoy this recipe, please leave me a 5-star rating ⭐️⭐️⭐️⭐️⭐️ in the recipe card! It really helps others find my content and helps my business grow! Sign up for my newsletter for recipes delivered to your inbox and follow me on Instagram and Pinterest! Thank you!
Recipe
Pampushky Recipe (Ukrainian Garlic Bread)
Equipment
- 8-inch cast iron skillet or 8-inch cake pan
- bench scraper optional
Ingredients
Pampushky rolls
- 390 grams flour divided
- 1 teaspoon sugar
- 2¼ teaspoon active dry yeast
- 8 ounces warm water (110-115 degrees F)
- 1½ teaspoon kosher salt
- 1 egg
- 1 tablespoon sunflower oil for the pan
Garlic-Herb Oil
- 3 tablespoon sunflower oil
- 5 garlic cloves or more or less
- ¼ cup chopped parsley
- maldon sea salt optional for finishing
Instructions
- Add the yeast and sugar to a large bowl. Add the warm water (between 110 and 115 degrees F) and whisk to combine. See note. Let the mixture sit for 10-15 minutes to allow the yeast to foam up. (If the yeast doesn't get foamy, it's no longer alive. Buy some new yeast and start again.)
- Add half of the flour (195 grams) to the yeast mixture (be sure to use a kitchen scale to weigh it for accuracy) and gently combine. Cover tightly with plastic wrap, and place in the refrigerator overnight.
- When you check on your starter the next day, it will have doubled in size and it will have all kinds of air bubbles in it! Whisk together the remaining flour (195 grams) and the kosher salt and add it to your starter. You can start with a spatula if you want, but then you'll need to use your hands to gently work the flour into the dough.
- Keep working the dough in the bowl with your hands until all of the flour has been incorporated and you have a rough ball of dough.
- On a lightly floured work surface, knead the dough until it is smooth, no longer sticking to your hands, and the gluten is well-developed. Add a bit more flour to your surface as you go when necessary.
- Divide the dough into 8 pieces. (I like to use a bench scraper to do this.) For evenly-sized pampushky, use your kitchen scale again to make sure each one weighs about the same, usually around 75-76 grams. Roll the dough between your hands to form round balls that are smooth on top. See note.
- Place the skillet in a warm place covered loosely with a kitchen towel and wait for the dough to rise, anywhere from 1 to 3 hours. See note. The rolls should be double in size and joined together along the sides and in the center.
- Preheat the oven to 425 degrees F. Beat an egg and set aside. Once the pampushky have risen, gently brush the tops of all the rolls with the beaten egg. Pop them in the oven and bake for 25-30 minutes until the tops are golden brown.
- While the pampushky bake, chop the garlic cloves and parsley, and add them to the sunflower oil. Set aside at room temperature until the rolls are done.
- As soon as the pampushky come out of the oven, drizzle them with the garlic-herb oil so they can soak in that flavor while they're hot! Serve immediately with more garlic oil on the side.
Want to save this recipe?
You'll join hundreds of readers on my email list!
Notes
- I warm up the water in 10-15 second increments in the microwave. I use a meat thermometer to check the temperature of my water. If the water is too cold, the yeast won't wake up. If it is too warm, you'll kill the yeast.
- Once the dough is divided, you may have to knead the dough balls a little bit to get a nice, round, smooth shape. It's fine to squeeze them a little and reform them, just don't overdo it.
- It's essential that you use a kitchen scale to weigh your flour. The amount of flour scooped into measuring cups can vary wildly each time depending on how packed down the flour happens to be.
- Pan size is important! This pampushky recipe is specifically written for an 8-inch cast iron skillet or 8-inch cake pan. The size is essential to ensure that they rise correctly without over-proving.
- You may have to knead the pampushy dough for anywhere from 8 to 14 minutes. I usually find that 10 - 12 minutes is the sweet spot as long as the kitchen isn't too cold.
- The time it takes for pampushky to rise once you've shaped them is going to depend on several things, including the activity of the yeast and the temperature of your kitchen. On average, it will take 2 - 3 hours. We're using a cold starter straight from the refrigerator, so if your kitchen is cold, the dough balls could still be a bit cold even after kneading for a while. The colder they are, the longer it will take to rise. If your kitchen is warm, you'll get results faster. I preheat the oven to warm up the kitchen, then turn it off until it's almost time to bake. I put the pan of pampushky in a warm spot on the counter near the oven covered with a towel.
Nutrition
Nutrition information is automatically calculated as an estimate. Calorie accuracy is not guaranteed.



Leave a Reply