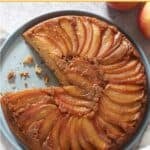
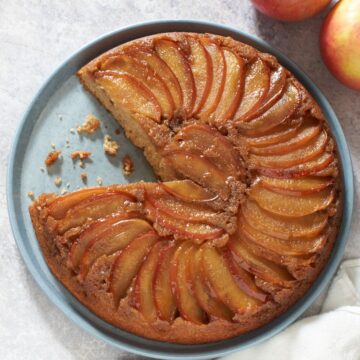
This easy caramel apple upside down cake is made in a 10-inch cast iron skillet, or a deep 9-inch cake pan, and it flips out of the pan flawlessly every time! It's beautiful, a little bit gooey, definitely caramel-y and VERY simple. You don't even need a mixer!

Given the choice, I'll pick an apple dessert every time, and this caramel apple upside down cake is no exception. But why is my version the best? Because of the method I'm using for the caramel apple topping. No fussing with melted sugar!
We're not even peeling the apples, because they are so pretty on top of the cake—and also because it's just so much easier and faster that way. And you don't need a mixer of any kind to make it, just stir it in a bowl like grandma used to!
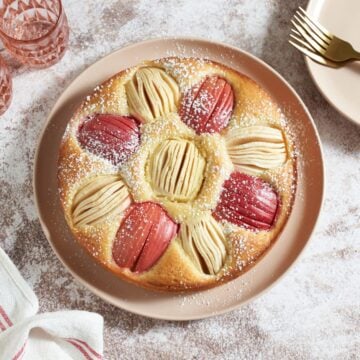
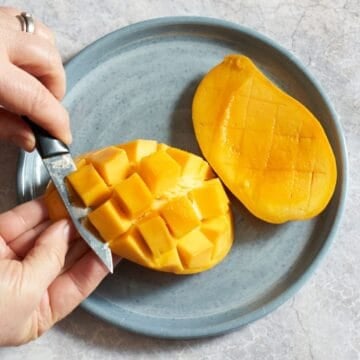
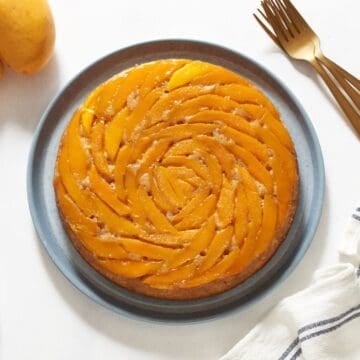
Upside down cakes are where it's at! I use this same method to make my Plum Upside Down Cake and this Mango Upside Down Cake!
Jump to:

Ingredients you'll need
For the caramel apple topping:
- Apples: Since we are not peeling the apples, pick a red or pink one, I used Pink Lady apples here, as their color looks prettier on the finished cake than green apples. Save the green apples to make apple crisp or an apple galette.
- Softened butter, dark brown sugar, kosher salt: We'll mix them together and spread in the bottom of the skillet. You can use light brown sugar if that is what you have on hand. I like the extra molasses flavor of dark brown sugar.
For the upside down cake batter
- AP flour, baking powder, baking soda, granulated sugar, dark brown sugar, eggs, vanilla: Baking powder and baking soda mean you get a great rise when it bakes!
- Cinnamon, cardamom, nutmeg: The perfect warm spice blend for an apple cake.
- Melted butter: Yay for melted butter for easy mixing!
- Yogurt: Yogurt adds moisture and a bit of acid to give the cake great flavor and texture.
*Ingredients with measurements are listed in the recipe card below.
How to make caramel apple upside down cake
Recipe adapted from multiple sources including NYT Cooking and Erin Jeanne McDowell.
Step 1: Make the brown sugar caramel topping
Preheat the oven to 350°F. Generously butter the sides of a 10-inch cast iron skillet or a 9-inch cake pan that is at least 2 inches deep.
Easiest upside down cake method: Instead of melting sugar and risking it re-hardening before you even get the cake in the oven, we're going to combine brown sugar with softened butter and spread it in the bottom of the pan. The sugar will melt and form the caramel apple topping as the cake bakes, meaning less steps for you and flawless caramelization.

Mix together the softened butter, ½ cup of brown sugar, and a pinch of salt. Spread the mixture evenly on the bottom of the pan.

Step 2: Prepare the wet and dry ingredients
In a large mixing bowl, whisk together the flour, baking powder, baking soda, cinnamon, cardamom, nutmeg and ¾ teaspoon kosher salt.

In another bowl, whisk together the melted butter, vanilla, brown sugar and granulated sugar.

Whisk the eggs into the sugar mixture one at a time.

Add the yogurt to the wet ingredients and whisk until smooth.
Want to save this recipe?
You'll join hundreds of readers on my email list!
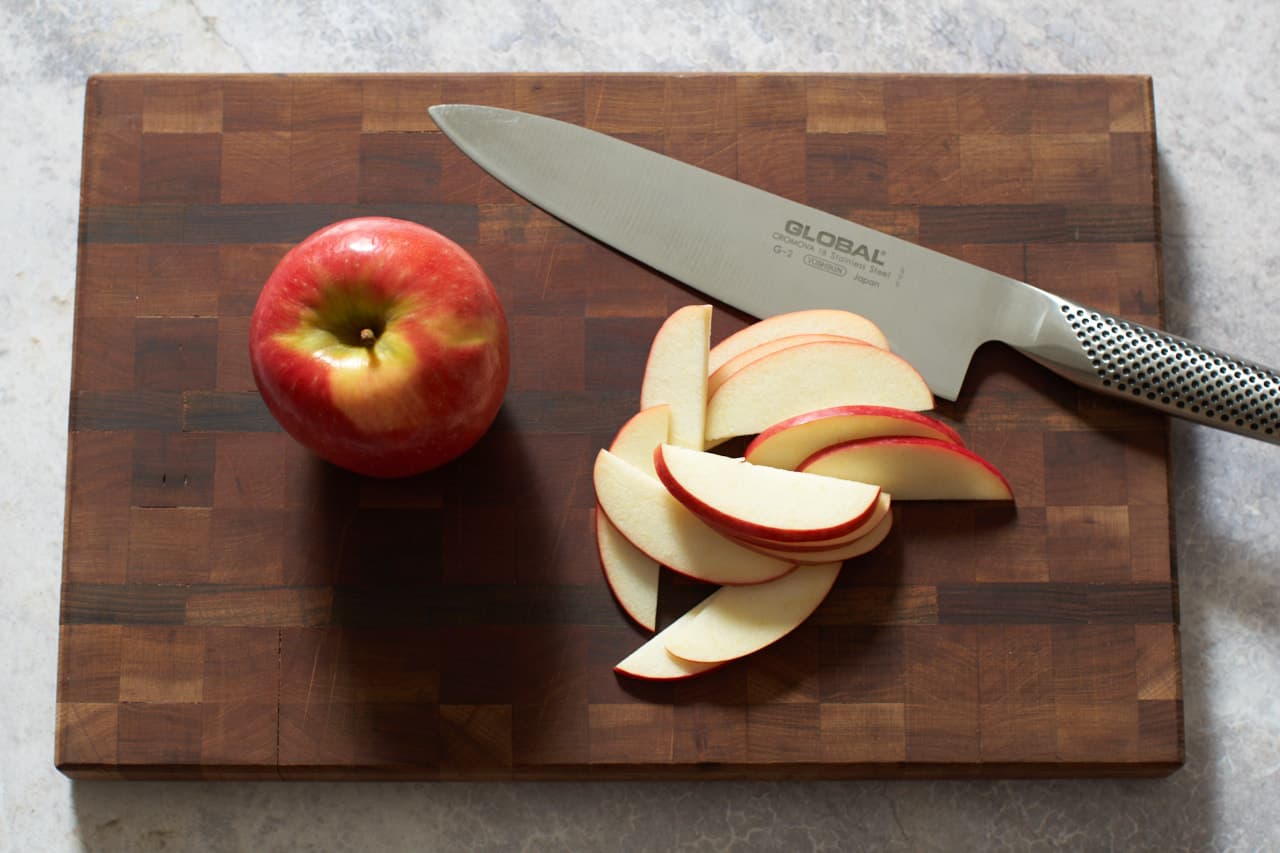
Step 3: Slice the apples and arrange them in the skillet or cake pan
Use a good chef's knife and slice the apples into ¼-inch wedges.

Place the apples in the pan in an overlapping circular pattern with the peel side touching the butter/brown sugar mixture. (So it looks pretty when you flip it!)

Step 4: Finish the cake batter
Add the dry ingredients to the wet ingredients in two batches. Use a silicone spatula to fold them together, smoothing out any lumps of flour as you go.

Transfer the batter to the pan, smoothing it out evenly with an offset spatula.
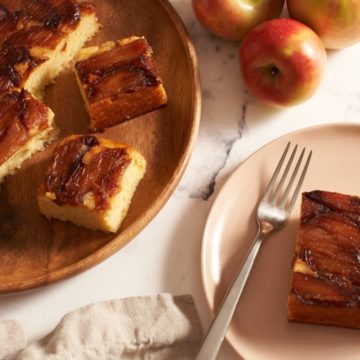
Step 5: Bake, flip, cool the caramel apple upside down cake
Bake on the center rack for 40-45 minutes, until it is a deep golden brown, it springs back to the touch, and a toothpick inserted into the center comes out clean.
As soon as the cake comes out of the oven, run a knife or offset spatula around the outside edge. Let the cake cool in the skillet for 10 minutes, then carefully flip out onto a plate and let it cool for at least 30 minutes before serving.
Let the cake rest in the pan for 10 minutes, but not more
Right when the cake comes out of the oven, the caramel is very liquid, and the apple juices are running all over the place. Letting it rest for 10 minutes in the pan will allow the caramel to cool just long enough to be set up, but it will still be warm enough to easily flip out onto the plate. Do not wait more than 10 minutes, as the heat of the pan will continue baking the cake and it could get tough.

Tips for flawless caramel apple upside down cake
- Pan size is important: You must use a 10-inch cast iron skillet, or a 9-inch cake pan that is at least 2 inches deep for this recipe. The amount of batter won't work in other sizes.
- Cram as many apple slices into the cake topping as you can: As they release their juices while cooking, you'll get more gooey caramel topping!
- Yes, wait to slice the apples until just before assembling the cake: It will keep them from turning brown, and you don't want to place the apples on the sugar too soon—they'll start releasing their juices before there is any cake batter there to sop them up.
- Spread the batter evenly and gently: You don't want any air pockets to form between the apples and the batter, but be gentle so you don't disturb the pattern of slices on the bottom of the pan.
- The cake will be very deeply golden when finished: This is due to a combination of the long baking time and the spices making the batter look darker.
- Upside down cakes have a dense texture: It's just the nature of the batter, it has to stand up to the caramelization going on in the pan and then be sturdy enough to support the weight of the fruit without it sinking down into the cake. It's a wonderful moist cake with a delicious crumb, it's just not going to puff up as much as other cakes that you might be used to making.
FAQ
A cast iron skillet's even heat ensures that the cake cooks perfectly throughout, and the heavy duty bottom melts the sugar and butter to form the caramel as the cake bakes. The nonstick surface means that the apples and caramel won't stick, and allows the upside down cake to flip out perfectly with no globs of fruit left behind. You must use a 10-inch skillet for this cake.
We are not peeling the apples, and green-skinned apples like Granny Smith just don't look pretty after the cake is flipped. Use a pink or red apple such as Pink Lady, Fuji, Gala or McIntosh.
More apple cake recipes you'll love
Debra's Details: This caramel apple upside down cake is easy, moist, and full of warm spices!
- Yogurt and melted butter keep this cake moist and delicious.
- Cinnamon, nutmeg and cardamom complement the apples and give the cake bold flavor.
- You don't need a mixer of any kind, just two bowls for wet and dry ingredients!
- Quick and easy prep: All the components are ready in 15 minutes!
If you enjoy this recipe, please leave me a 5-star rating ⭐️⭐️⭐️⭐️⭐️ in the recipe card! It really helps others find my content and helps my business grow! Sign up for my newsletter for recipes delivered to your inbox and follow me on Instagram and Pinterest! Thank you!
Recipe
Caramel Apple Upside Down Cake
Want to save this recipe?
You'll join hundreds of readers on my email list!
Equipment
- 10" cast iron skillet or 9-inch cake pan at least 2 inches deep
- offset spatula optional
Ingredients
Caramel Apple Topping
- 2-3 red apples pink lady, fuji, or other
- 6 tablespoon unsalted butter softened
- ½ cup dark brown sugar
- pinch kosher salt
Upside Down Cake Batter
- 1½ cups all-purpose flour
- 1½ teaspoon baking powder
- ¼ teaspoon baking soda
- ¾ teaspoon kosher salt
- 1½ teaspoon cinnamon
- ¼ teaspoon cardamom
- ¼ teaspoon nutmeg
- ½ cup melted unsalted butter
- ¾ cup granulated sugar
- ¼ cup dark brown sugar
- 1 teaspoon vanilla
- 2 eggs
- ½ cup greek yogurt
Instructions
- Preheat the oven to 350 degrees F. Generously butter the sides of a 10-inch cast iron skillet or a 9-inch cake pan that is at least 2 inches deep.
- Mix together the softened butter, ½ cup of brown sugar, and a pinch of kosher salt. Spread the mixture evenly on the bottom of the pan.
- In a large mixing bowl, whisk together the flour, baking powder, baking soda, cinnamon, cardamom, nutmeg and ¾ teaspoon kosher salt.
- In another bowl, whisk together the melted butter, vanilla, brown sugar and granulated sugar. Then whisk the eggs into the sugar mixture one at a time.
- Add the yogurt to the wet ingredients and whisk until smooth.
- Cut the apples into ¼ inch slices. Squeeze a bit of lemon juice on them and toss around to keep them from browning while you arrange them on top.
- Place the apples in the pan in an overlapping circular pattern with the peel side touching the butter/brown sugar mixture. (So it looks pretty when you flip it!)
- Add the dry ingredients to the wet ingredients in two batches. Use a silicone spatula to fold them together, smoothing out any lumps of flour as you go. Transfer the batter to the pan, smoothing it out evenly with an offset spatula or silicone spatula. (See note below.)
- Bake on the center rack for 40-45 minutes, until it is a deep golden brown, it springs back to the touch, and a toothpick inserted into the center comes out clean.
- As soon as the cake comes out of the oven, run a knife or offset spatula around the outside edge. Let it cool in the pan for 10 minutes. Then carefully flip it out onto a plate and let cool for at least 30 minutes before serving.
Notes
- Cram as many apple slices into the topping as you can: As they release their juices while cooking, you'll get more gooey caramel topping!
- Make sure to spread the batter gently and evenly: You don't want any air pockets to form between the apples and batter, but you don't want to disturb the apples and ruin the pattern, either.
- The cake will be very deeply golden when finished: This is due to a combination of the long baking time and the spices in the batter.
- Upside down cakes have a dense texture: It's just the nature of the batter, it has to stand up to the caramelization going on in the pan and then be sturdy enough to support the weight of the fruit without it sinking down into the cake. It's still a wonderful moist cake with a delicious crumb, it's just not going to puff up as much as other cakes that you might be used to making.
- Storage: It's best eaten on the day it's made, but you can cover it tightly and keep it on the countertop for up to 2 days. If you want to store it longer, wrap it up or put it in an airtight container in the refrigerator for up to 5 days.
- Freezing: This cake freezes well! I cut it into slices and wrap them individually so I can have a small treat whenever the mood strikes. Just unwrap and zap it in the microwave for 30-60 seconds until it's warmed through.
Nutrition
Nutrition information is automatically calculated as an estimate. Calorie accuracy is not guaranteed.


Leave a Reply