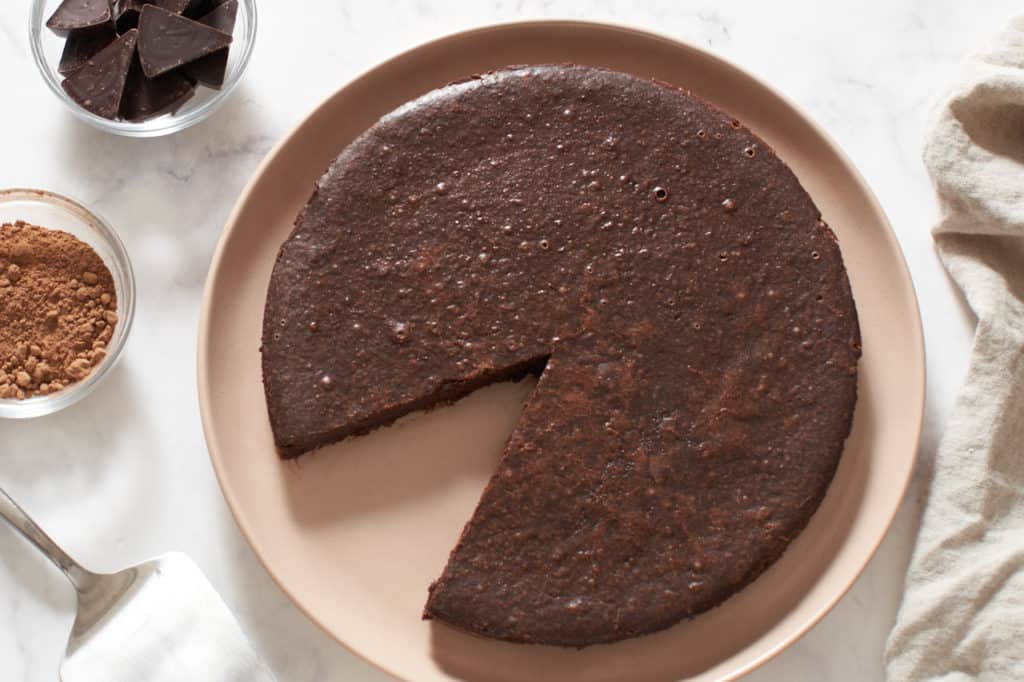
This flourless chocolate torte recipe is about as easy as you can get! Only 6 ingredients and you don't need a mixer to make it. Just combine ingredients in a couple of bowls and pour into a springform pan.
This post contains affiliate links. If you purchase through one of my links, I may make a small commission at no additional cost to you. As an Amazon Associate, I earn from qualifying purchases. Read my full disclosure policy here.
Am I bringing back the '90s with this flourless chocolate torte recipe? Maybe I am, but I think it's justified! Remember when these fudgy, ultra decadent chocolate cakes were everywhere? But now...not so much. Let's change that shall we?
And why not? This is deceptively simple to make. It's a secret that French grandmothers (and François Payard) have always known. This recipe is adapted from Payard's book, Chocolate Epiphany.
There are a couple of different versions of the classic French-style flourless chocolate torte. This recipe is the easiest version, because it does not require you to separate the eggs and whip the whites. This results in a silkiness all the way through, and makes prep really easy. It's baked in a water bath, which ensures even baking and a smooth texture.
You don't have to be a baking genius to make this flourless chocolate torte. The only thing you have to be is patient.
Jump to:
What is a flourless chocolate torte and why should you make one?
Hint: because it's super chocolaty, and so quick and easy!
- A flourless chocolate torte is a great staple to have in your baking arsenal. Everyone loves chocolate, and you may already have all the ingredients you need in your pantry. It's the kind of treat you can make on a whim, with no planning.
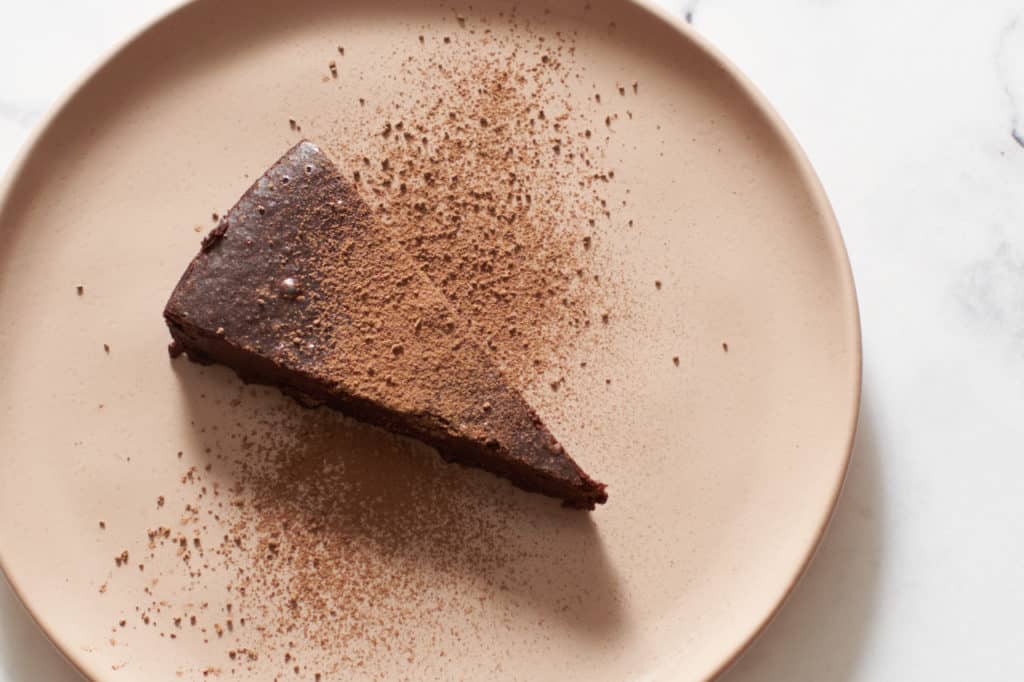
- The texture of a flourless chocolate torte is almost like a cross between fudge and a custard. But it's not toothache sweet like fudge. It's smooth and creamy like custard, yet has enough structure that you can cut it with a knife.
- The only special equipment needed is a springform pan. Other than that, two mixing bowls and a spatula will do you. No mixer needed. (I love my mixer. I also love not having to use it...)
- It only takes 20 minutes of prep time!
- It's gluten free!
- As I said earlier, the key to this recipe is patience. You must allow the cake to cool completely, then put it in the freezer for 30 minutes before unmolding. I know it's hard to wait, but you can do it. It'll be worth it, I promise.
Ingredients you'll need
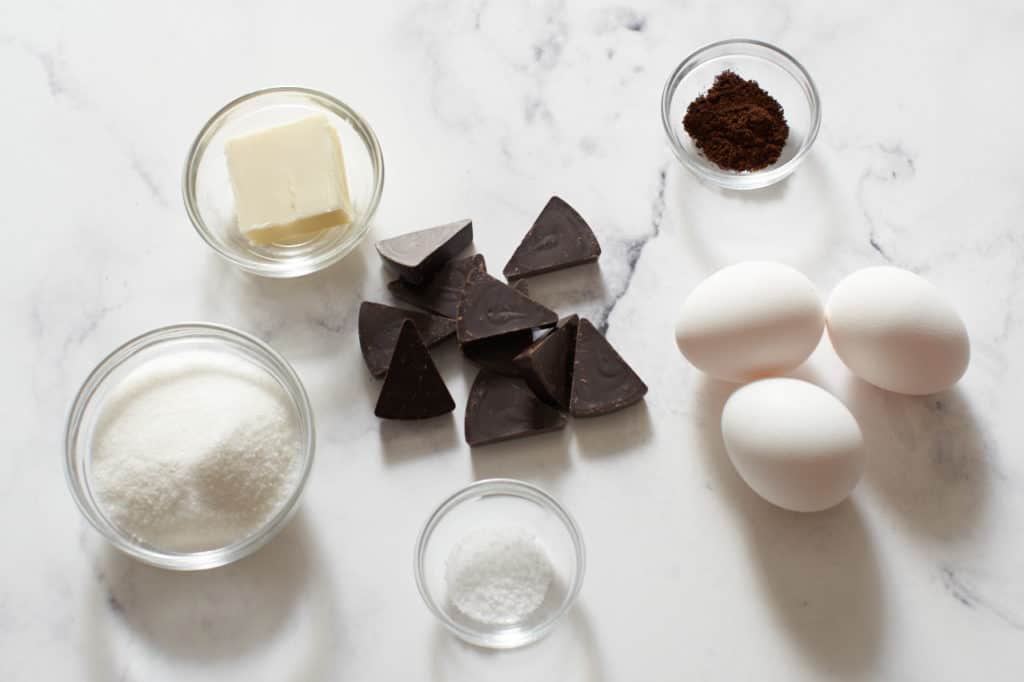
You only need 6 ingredients to make this picture perfect flourless chocolate torte, and one of them is optional!
- Dark chocolate: You'll need at least 60% cacao, and even more is better. The cocoa gives the torte structure. I have used Guittard extra dark chocolate chips which are 63% cacao, and gone even further by using a combo of the Guittard 74% baking wafers and their 63% chips.
- Unsalted butter: We're essentially making a ganache here, so you'll melt the chocolate and the butter together.
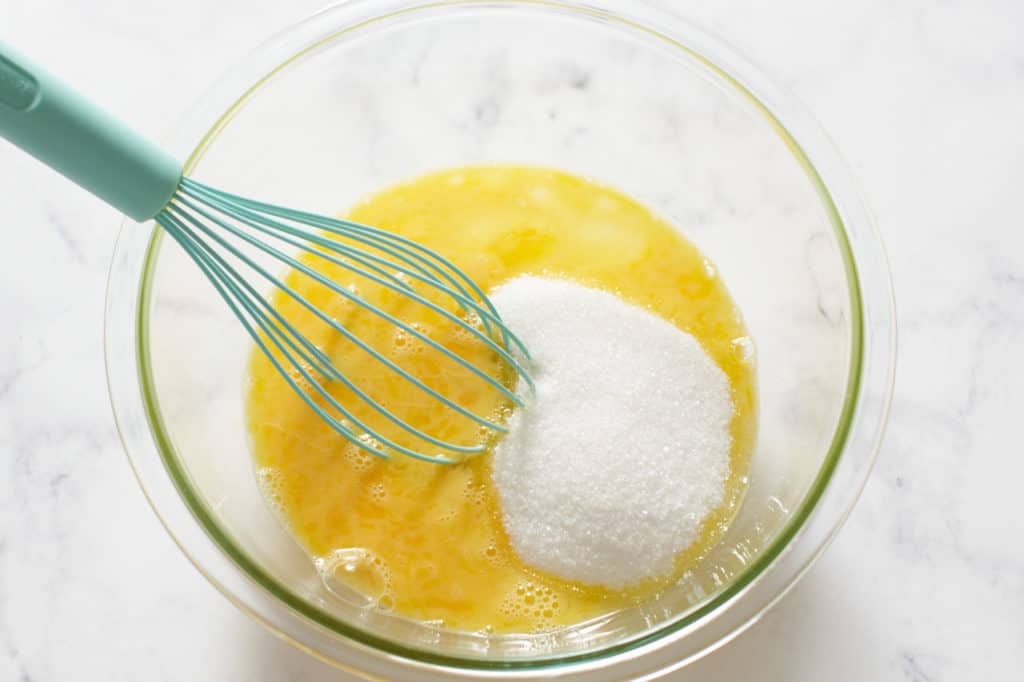
- Eggs and sugar: We'll gently whisk them together to create a custard base.
- Finely ground coffee and a pinch of kosher salt: The coffee is optional, but it gives the chocolate another definition of flavor, and you need that teeny bit of salt to balance the sweetness.
How to make a flourless chocolate torte
Step 1: Preheat the oven and prep the pan
Preheat the oven to 325 degrees F.
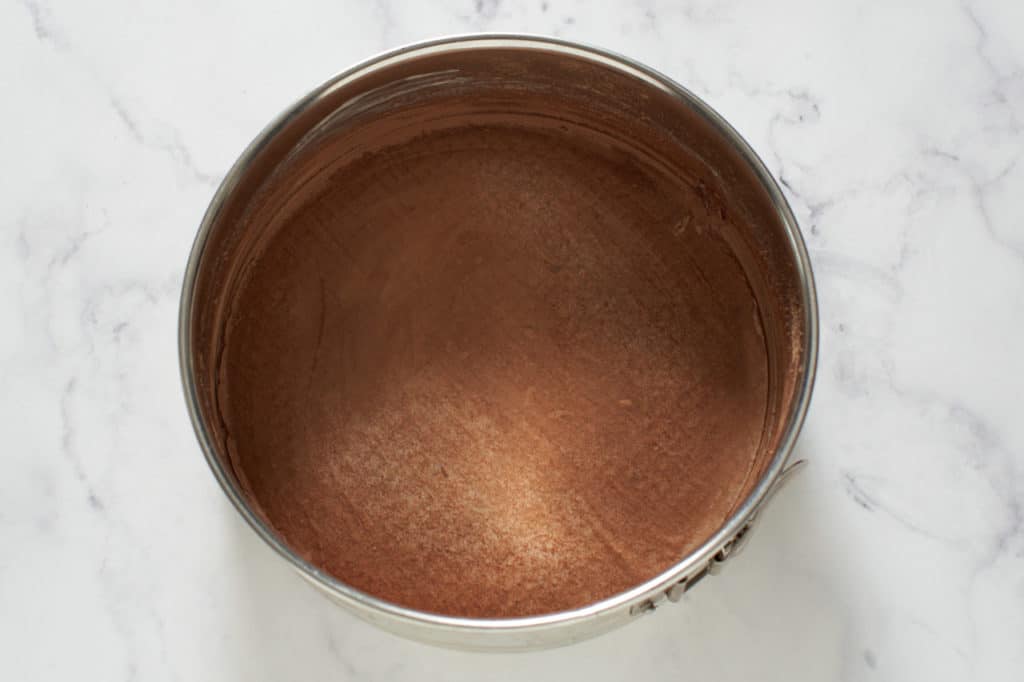
Butter the bottom and sides of a 9-inch springform pan. Cut a circle of parchment slightly larger than the bottom of the pan, and butter it as well. Add a pinch of cocoa powder and dust the pan.
Wrap the bottom of the pan in 2 or 3 layers of aluminum foil, going pretty far up the sides. This will help keep any water from the water bath from seeping into the pan while baking.
Step 2: Melt the chocolate
Place a small saucepan of water over medium high heat and bring to a low simmer. Lower heat, and place a glass heatproof bowl on top of the pan, ensuring that the bottom of the bowl is not touching the water. You don't want the water boiling, just gentle simmering.
Pro tip
This method of melting chocolate is slow and gentle and keeps the chocolate from seizing. I use the same method in lots of chocolate recipes and it's the best way to make dark chocolate ganache, too!
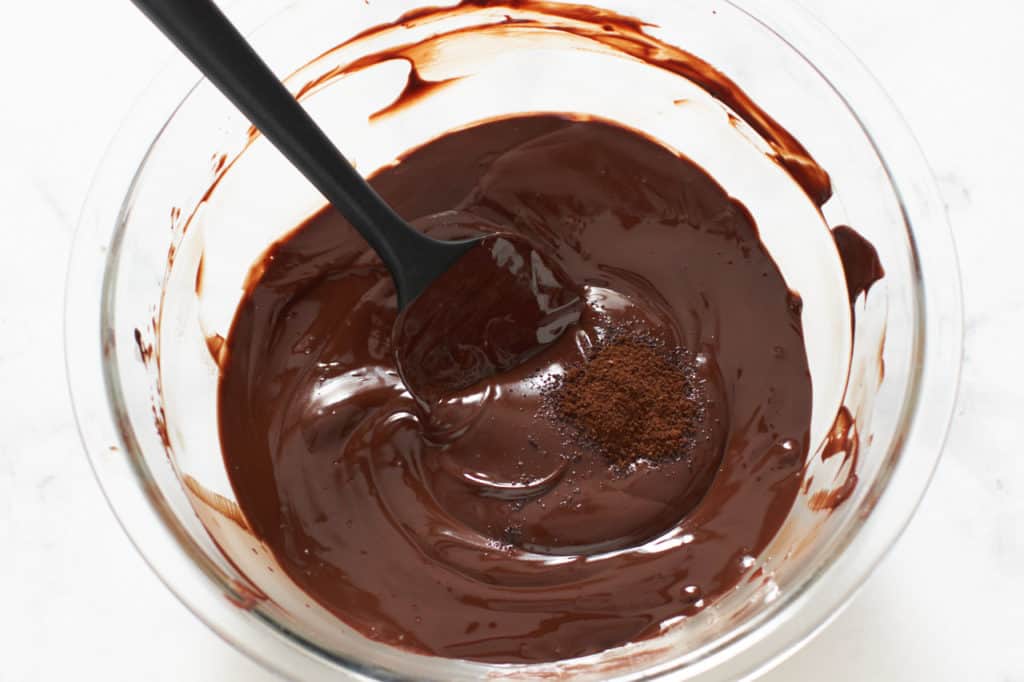
Add the butter and chocolate to the bowl, stirring frequently until both are melted and completely combined.
Want to save this recipe?
You'll join hundreds of readers on my email list!
Stir in the coffee and the salt, set aside to cool slightly.
Step 3: Whisk the eggs and sugar
Add the eggs to a separate bowl, whisk them gently to break up the yolks. Then whisk or stir in the sugar until just combined. You don't want to create any froth or volume, you're just bringing the ingredients together.
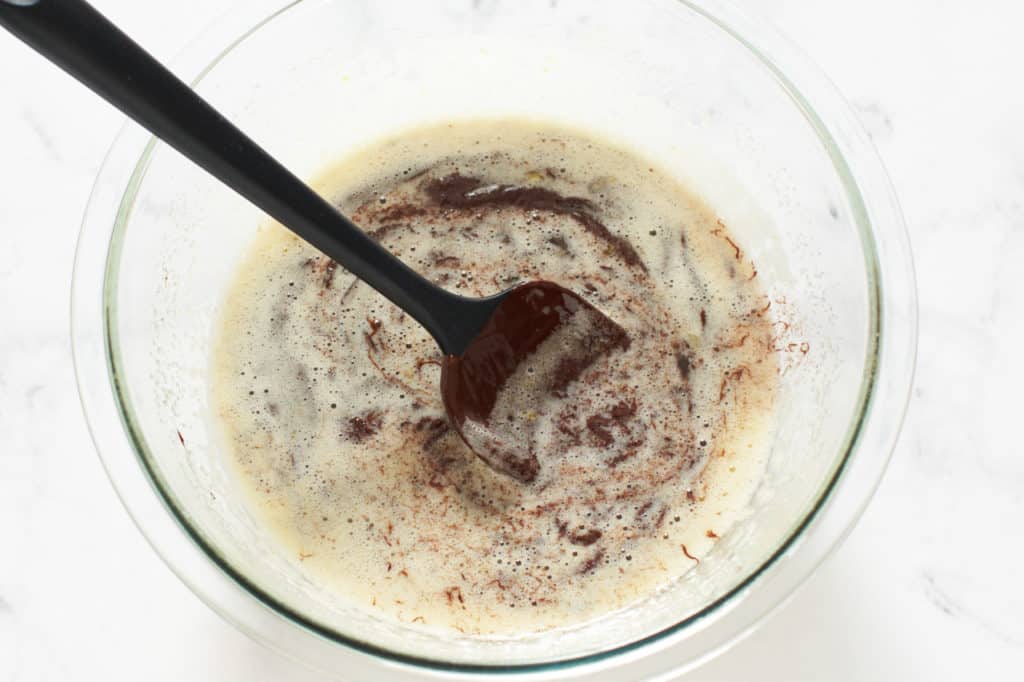
Step 4: Combine the chocolate and egg mixture
Gently add the cooled, melted chocolate into the egg mixture in three batches, using a spatula to gently stir them together until combined after each addition.
Step 5: Bake in a water bath
Pour the batter into the prepared pan and prepare the water bath.
Place the springform pan into a roasting pan that is larger on all sides. Add warm water to the roasting pan, going up the sides of the springform pan about a third of the way.
Bake in the water bath for 50-60 minutes until the center is set and doesn't jiggle.
Step 6: Cool the chocolate torte completely
Carefully remove the foil—there may be a bit of water in the layers, so be very careful as both the foil and water will be very HOT. Allow the torte to cool completely in the pan, then place it in the freezer for 30 minutes. Remove from freezer and carefully open the sides of the pan to unmold the torte.
Step 7: How to unmold the torte
Now, here's the part that requires a bit of dexterity.
- Carefully flip the torte onto a plate so it's top-side down.
- Lift the edges of the parchment up all the way around and carefully remove the parchment and the bottom of the springform pan.
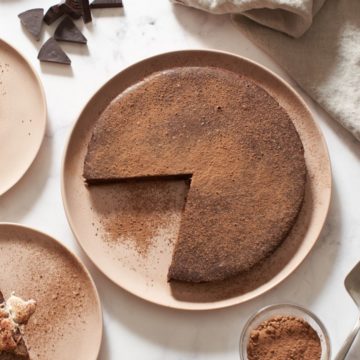
- Place another plate onto the bottom of the torte and flip it so it's right-side up. Allow to sit at room temperature for 15 minutes. Sprinkle with cocoa powder and serve.
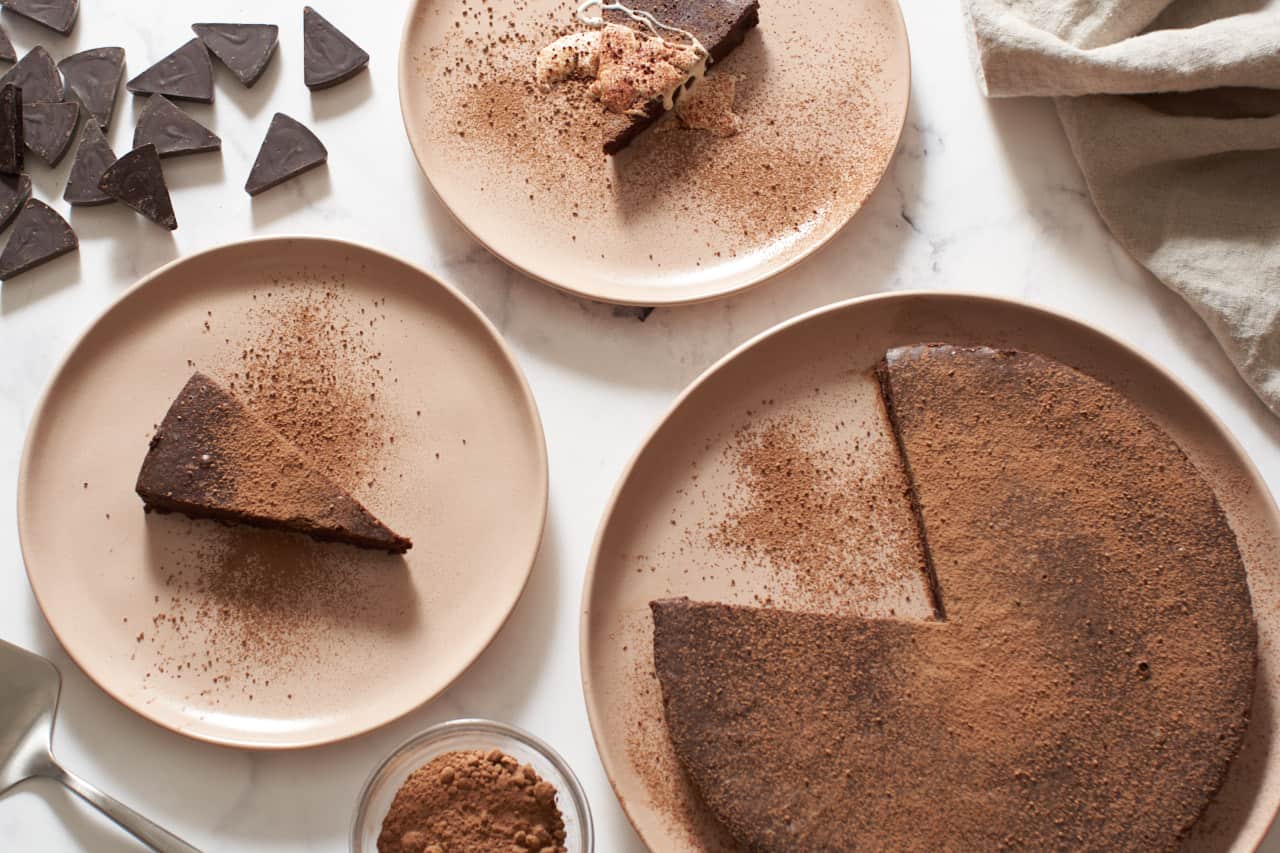
How to serve a flourless chocolate torte
- You can dust the torte with cocoa powder or powdered sugar, whichever you prefer. I like the look of the cocoa powder and I don't think it needs the extra sweetness from powdered sugar.
- Top your flourless chocolate torte with crème fraîche, this easy strawberry compote, or whipped cream. It's already plenty sweet, so of these choices, crème fraîche is my favorite, because it adds a bit of acidity to cut through the richness without any sugar.
- Store in the fridge for up to three days, or tightly wrapped in the freezer for up to a month.
Tips for the best flourless chocolate torte
- Be sure to make the parchment circle in the pan bigger than the bottom. This gives you a bit of parchment all the way around the sides of the pan, making unmolding easier, and also ensuring you can remove the bottom of the pan easily, without damaging the torte.
- The melted chocolate should cool to about body temperature before you add it to the egg mixture. This way it's still warm and fluid enough to blend thoroughly, but cool enough so it won't scramble the eggs.
- For faster cooling, place the pan on a wire rack, and place it near a fan so air circulates all around it. I cool mine under the ceiling fan!
- To cut, first run a knife under hot water then dry it. Wipe knife clean and repeat for both sides of each slice.
FAQ
Typically tortes are much thinner, denser, and most often made without flour. In many cases, they are topped with ganache or may have a layer of mousse. This recipe showcases the torte in its simplest form, just one layer.
Yes! You can make it up to three days ahead. Store it covered in plastic wrap in the fridge. Wait until you are ready to serve before dusting with cocoa or powdered sugar.
Yes you can! Wrap it tightly in plastic wrap and it will keep in the freezer for up to a month. Allow to thaw completely in the fridge, then let stand at room temp for 15 minutes before slicing.
No, you can't. Since there is no flour in the recipe, you need all that cocoa in the bittersweet chocolate to give it structure.
More gluten free chocolate dessert recipes
Chocolate lends itself well to gluten free desserts. Try these!
- A simple crust made from ground pistachios adds texture to this Gluten Free Chocolate Ganache Tart.
- Chocolate Pots de Crème are rich, decadent baked custards that only have 4 ingredients!
- If you'd rather just drink your dessert, then French Hot Chocolate (Chocolat Chaud) is the one for you!
- These Gluten Free Brownies get their luscious texture from almond flour and ricotta cheese.
Recipe
Flourless Chocolate Torte
Ingredients
- 11 ounces dark chocolate at least 60% cacao
- 9 tablespoon unsalted butter plus more for the pan
- 5 large eggs at room temperature
- 1 ⅓ cups sugar
- ½ teaspoon finely ground coffee optional
- pinch kosher salt
- cocoa powder to dust the pan
Instructions
- Preheat the oven to 325 degrees F.
- Butter the bottom and sides of a 9-inch springform pan. Line the bottom of the pan with a circle of parchment slightly larger than the bottom of the pan, and butter it as well. Add a pinch of cocoa powder and dust the pan.
- Wrap the bottom of the pan in 2 or 3 layers of aluminum foil, going pretty far up the sides. This will help keep any water from the water bath from seeping into the pan while baking.
- Place a small saucepan of water over medium high heat and bring to a low simmer. Lower heat, and place a glass heatproof bowl on top of the pan, ensuring that the bottom of the bowl is not touching the water. Don't allow the water to boil, keep it at a low simmer.
- Add the butter and chocolate to the bowl, stirring frequently until both are melted and completely combined. Stir in the coffee and the salt, set aside to cool slightly.
- Add the eggs to a separate bowl, whisk them gently to break up the yolks. Then whisk or stir in the sugar until just combined. You don't want to create any froth or volume, you're just bringing the ingredients together.
- Gently add the cooled, melted chocolate into the egg mixture in three batches, using a spatula to gently stir them together until combined after each addition.
- Place the springform pan into a roasting pan that is larger on all sides. Add warm water to the roasting pan, going up the sides of the springform pan about a third of the way to create a water bath. (Be careful not to spill any water into the torte.) Bake for 50-60 minutes until the center is set and doesn't jiggle.
- Carefully remove the foil—there may be a bit of water in the layers, so be very careful as both foil and water will be very HOT. Allow the torte to cool completely in the pan, then place it in the freezer for 30 minutes.
- Remove from freezer and carefully open the sides of the pan to unmold the torte. Now, here's the part that requires a bit of dexterity. 1. Carefully flip the torte onto a plate so it's top-side down. 2. Lift the edges of the parchment up all the way around, then carefully remove the parchment and the bottom of the springform pan. 3. Place another plate onto the bottom of the torte and flip it so it's right-side up. Allow to sit at room temperature for 15 minutes. Sprinkle with cocoa powder and serve.
- Store in the fridge for up to three days, or tightly wrapped in the freezer for up to a month.
Want to save this recipe?
You'll join hundreds of readers on my email list!
Notes
- Adapted from François Payard's book, Chocolate Epiphany.
- Be sure to make the parchment circle in the pan bigger than the bottom. This gives you a bit of parchment all the way around the sides of the pan, making unmolding easier, and also ensuring you can remove the bottom of the pan easily, without damaging the torte.
- The melted chocolate should cool to about body temperature before you add it to the egg mixture. This way it's still warm and fluid enough to blend thoroughly, but cool enough so it won't scramble the eggs.
- For faster cooling, place the pan on a wire rack, and place it near a fan so air circulates all around it. I put mine under the ceiling fan!
- To cut, first run a knife under hot water. Wipe knife clean and repeat for each slice.
- This is probably more than 8 servings, maybe more like 12 or 16, but I erred on the side of larger slices because maybe that's what you'll want. It's very rich and chocolaty!
- Be sure to read the post above for FAQs, ingredient tips and serving suggestions.
Nutrition
Nutrition information is automatically calculated as an estimate. Calorie accuracy is not guaranteed.


Leave a Reply