Pumpkin Scones Recipe
Servings: 8 scones
Calories: 443kcal
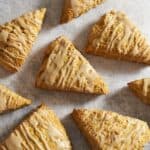
These pumpkin scones are light, flaky, crumbly, and loaded with pumpkin spice flavor! The maple glaze is the perfect icing for a taste of fall! Quick and easy, no need to chill the dough!
Print Recipe
US Customary - Metric
Equipment
- mixing bowls
- pastry blender
- bench scraper
- whisk
- baking sheet
- parchment paper
Ingredients
- 3 cups flour
- ¼ cup brown sugar light or dark
- 2 teaspoon baking powder
- ½ teaspoon baking soda
- 1½ teaspoon pumpkin pie spice or make your own blend, see note
- ¾ teaspoon kosher salt
- 8 tablespoon unsalted butter (1 stick)
- 2 eggs
- ⅔ cup pumpkin puree
- 1 teaspoon vanilla extract
Maple Glaze
- 2 tablespoon unsalted butter
- ⅓ cup pure maple syrup
- 1 cup confectioners sugar
- ¼ teaspoon kosher salt
Instructions
Pumpkin Scones
- Preheat the oven to 400 degrees F and line a baking sheet with parchment paper.
- Cut your butter into small cubes and place in the freezer for about 10 to 15 minutes while you gather the other ingredients. In a large bowl, whisk the flour, sugar, pumpkin pie spice, baking powder, baking soda and salt together.
- Add the cubed butter to the dry ingredients and toss to coat.
- Then use a pastry blender or your fingers to work the butter into the dough until it is the size of small peas.
- In a small bowl, whisk the eggs, vanilla, and pumpkin puree together until completely smooth. Make a well in the center of the flour mixture and pour the pumpkin mixture into it.
- Working from the outside edge of the bowl, use a wooden spoon or a silicone spatula to move the flour toward the center and gently mix in the liquid. A shaggy dough will form. Don't over-mix it or try to get all of the flour coated with wet ingredients yet.
- Turn the dough out onto a lightly floured surface and bring it together with your hands. Use a bench scraper to turn the dough onto itself a few times until it mostly holds together. This is called laminating the dough. See tips below.
- Gently press the scone dough into a ¾-inch thick circle or square (or square-ish circle) and use the bench scraper or a knife to cut into 8 triangular shaped pieces. Some dry flour may still be visible and that is okay.
- Place the scones about 1 inch apart on a parchment lined baking sheet and bake for 20-25 minutes until they are just barely turning golden brown.
- Slide the the parchment paper with the scones still on it onto a rack to cool for about 5 minutes. Drizzle the glaze over the top while they are still warm and serve.
Maple Glaze
- While the pumpkin scones are baking, add the maple syrup, melted butter, powdered sugar and salt to a small bowl and whisk until all the sugar is incorporated. Set aside until scones have finished baking.
- You should have enough glaze to ice the scones completely or just drizzle them, whichever you prefer. Or do half of them iced and half of them drizzled! If the glaze starts to thicken up too much, just pop it into the microwave for 10 seconds at a time until it loosens up again.
Notes
- To make your own pumpkin spice blend, combine ½ teaspoon cinnamon, ¼ teaspoon ground ginger, ¼ teaspoon ground cloves, and ¼ teaspoon ground nutmeg.
- What's the secret to the lightest, fluffiest pumpkin scones? Laminate the dough! You might only think of laminating dough when you make something like puff pastry, but a very simplified version of this technique will also give a lift to your scones! The cold butter gets in between the layers of dough to puff them up! Just gently turn the dough over onto itself a few times with a bench scraper. It's as simple as that! If you don't have one, you could use your hands or a large spatula to do it.
- Don't overwork the dough. To keep scones tender, handle the dough as little as possible. Just bring it together gently with a wooden spoon and then your hands. Once you bring it into a circle or square, don't worry about making the surface smooth. Those lines and crags will turn into great texture on top!
- Use cold butter and cold eggs! We want those two ingredients to create steam once they hit the hot oven so our pumpkin scones rise as high as possible.
- Is your kitchen hot? There are a few things you can do to keep the scone dough cold. Chill the bowl you're using to mix the dough, chill all the ingredients including the flour, or pop the shaped scones into the freezer for 10 minutes or so before baking. (This last option could lengthen the baking time.)
- Scones are best the day they are made, but these will store in an airtight container for up to 2 days.
Nutrition
Calories: 443kcal | Carbohydrates: 69g | Protein: 7g | Fat: 16g | Saturated Fat: 9g | Polyunsaturated Fat: 1g | Monounsaturated Fat: 4g | Trans Fat: 1g | Cholesterol: 79mg | Sodium: 383mg | Potassium: 256mg | Fiber: 2g | Sugar: 30g | Vitamin A: 3675IU | Vitamin C: 1mg | Calcium: 89mg | Iron: 3mg
